Authentication - Set up access token permissions with Nuxt.js
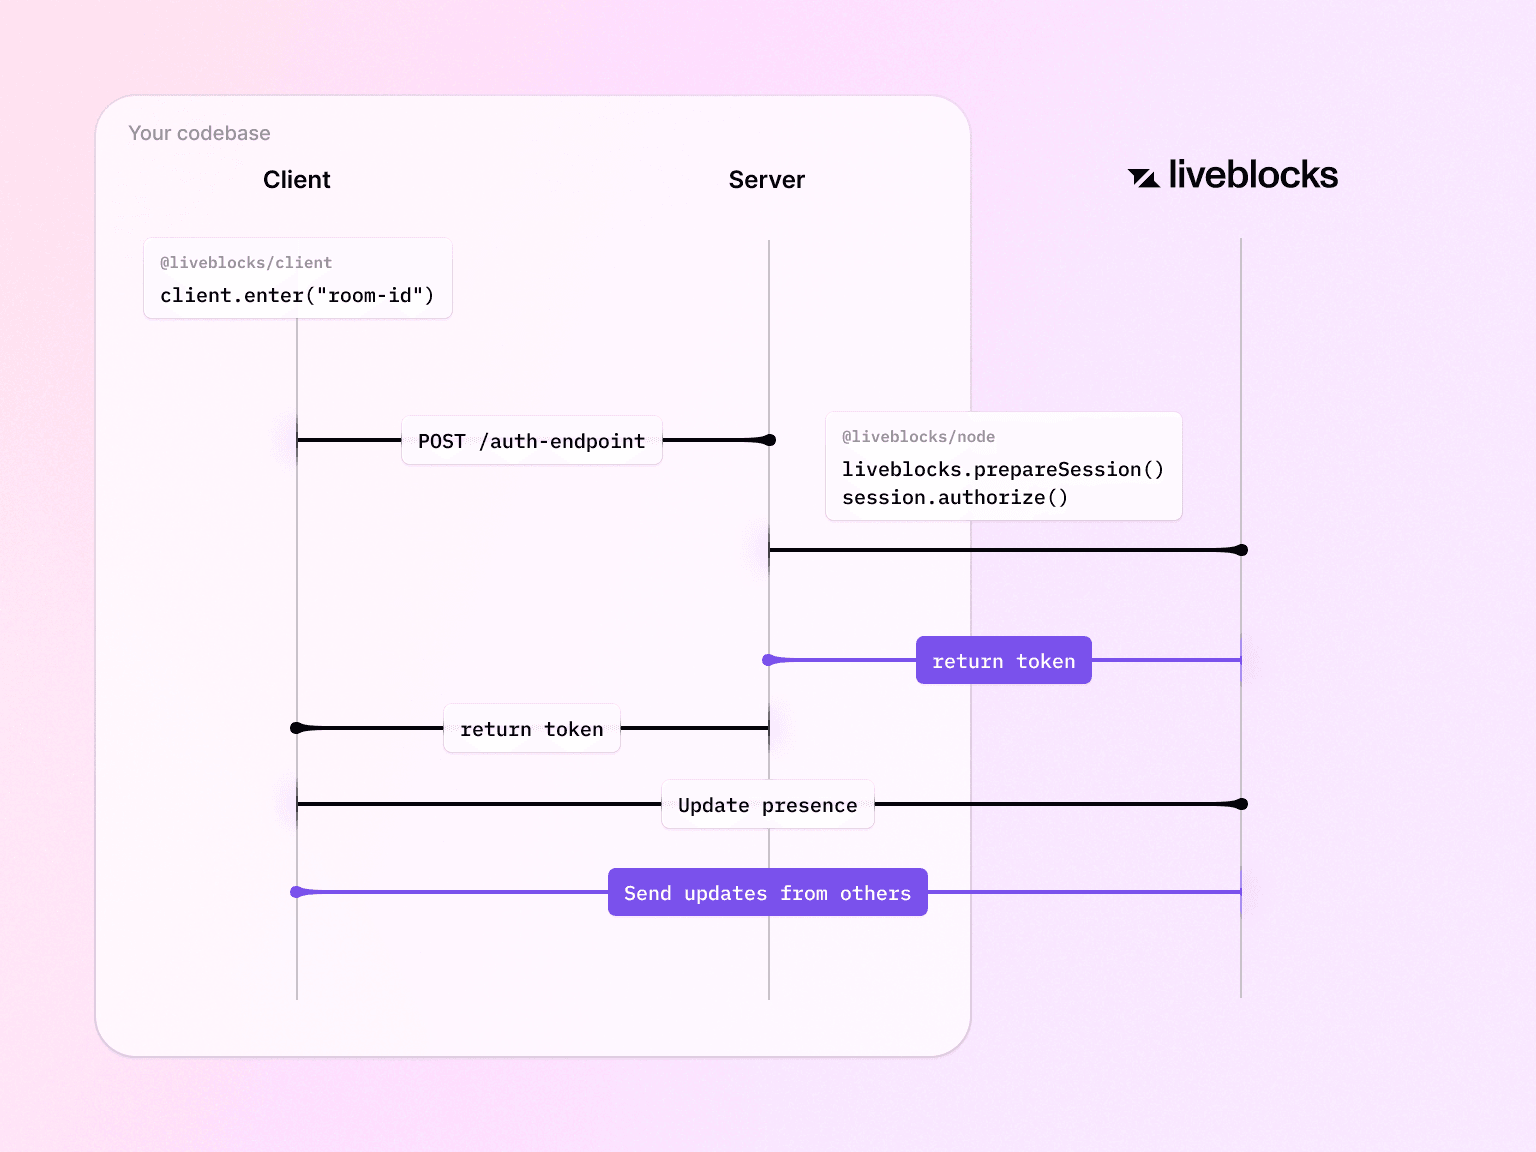
Follow the following steps to start configure your authentication endpoint and start building your own security logic.
Quickstart
Install the
liveblocks/nodepackageSet up authentication endpoint
Users need permission to interact with rooms, and you can permit access in an
api/liveblocks-authendpoint by creating theserver/api/liveblocks-auth.tsfile with the following code. This is where you will implement your security and define the rooms that the user has access to.With access tokens, you should always use a naming pattern for your room IDs, as this enables you to easily allow access to a range of rooms at once. In the code snippet below, we’re using a naming pattern and wildcard
*to give the user access to every room in their organization, and every room in their group.server/api/liveblocks-auth.tsRead access token permission to learn more about naming rooms and granting permissions with wildcards. Note that if a naming pattern doesn’t work for every room in your application, you can grant access to individual rooms too.
Set up the client
On the front end, you can now replace the
publicApiKeyoption withauthEndpointpointing to the endpoint you just created.liveblocks.config.tsIf you need to pass custom headers or data to your endpoint, you can use authEndpoint as a callback instead.
More information
Both userId and userInfo can then be used in your Vue.js application as
such:
