Authenticate users with access tokens
Access token authentication is an alternative method to authenticate your users in your application. With access tokens, when a user authenticates, it’s up to you to let Liveblocks know which rooms they should be allowed inside. This means that you need to manually keep track of which users should be allowed in which rooms, and apply these permissions yourself each time a user connects.
Access tokens have limitations when granting nested permissions. If you’re looking to build an application with permissions at organization, group, and user levels, we recommend using ID tokens instead.
Authenticating
Authenticating with access tokens means creating a
JSON Web Token (JWT) that grants
the current user permission to enter certain rooms when connecting to
Liveblocks. An access token is created by calling
liveblocks.prepareSession
then by allowing access to certain rooms.
Before using access tokens, it’s recommended to read through this entire page, as it explains helpful practices for granting access to rooms. However, if you’d like to get set up now, you can select your framework and read more later.
Workspace permissions
Using organizations, you can create workspaces in your application, compartmentalizing all resources such as inbox notifications and rooms. This includes everything associated with rooms such as comment threads, realtime data stored, and more. This allows you to add a workspace switcher to your application, separating each of your customers/organizations.
Set up workspace permissions
To set up workspace permissions, pass an organizationId when authenticating a
user, ensuring that the user will only have access to resources within this
workspace.
When creating a resource on the server, such as a room, pass the
organizationId to the resource, to allow the user access.
Room permissions
When granting permissions using access tokens, it’s recommended to use a naming pattern for your room IDs. This makes it easy to use wildcard permissions, allowing you to authenticate access to multiple rooms at once. One scenario where this is helpful, is when rooms and users in your app are part of a team or group, and you need to permit users entry to each room that’s part of this.
Group hierarchy
Let's picture an organization in your product, Acme, set up using workspace permissions. This customer has a number of group, and each group contains a number of documents.
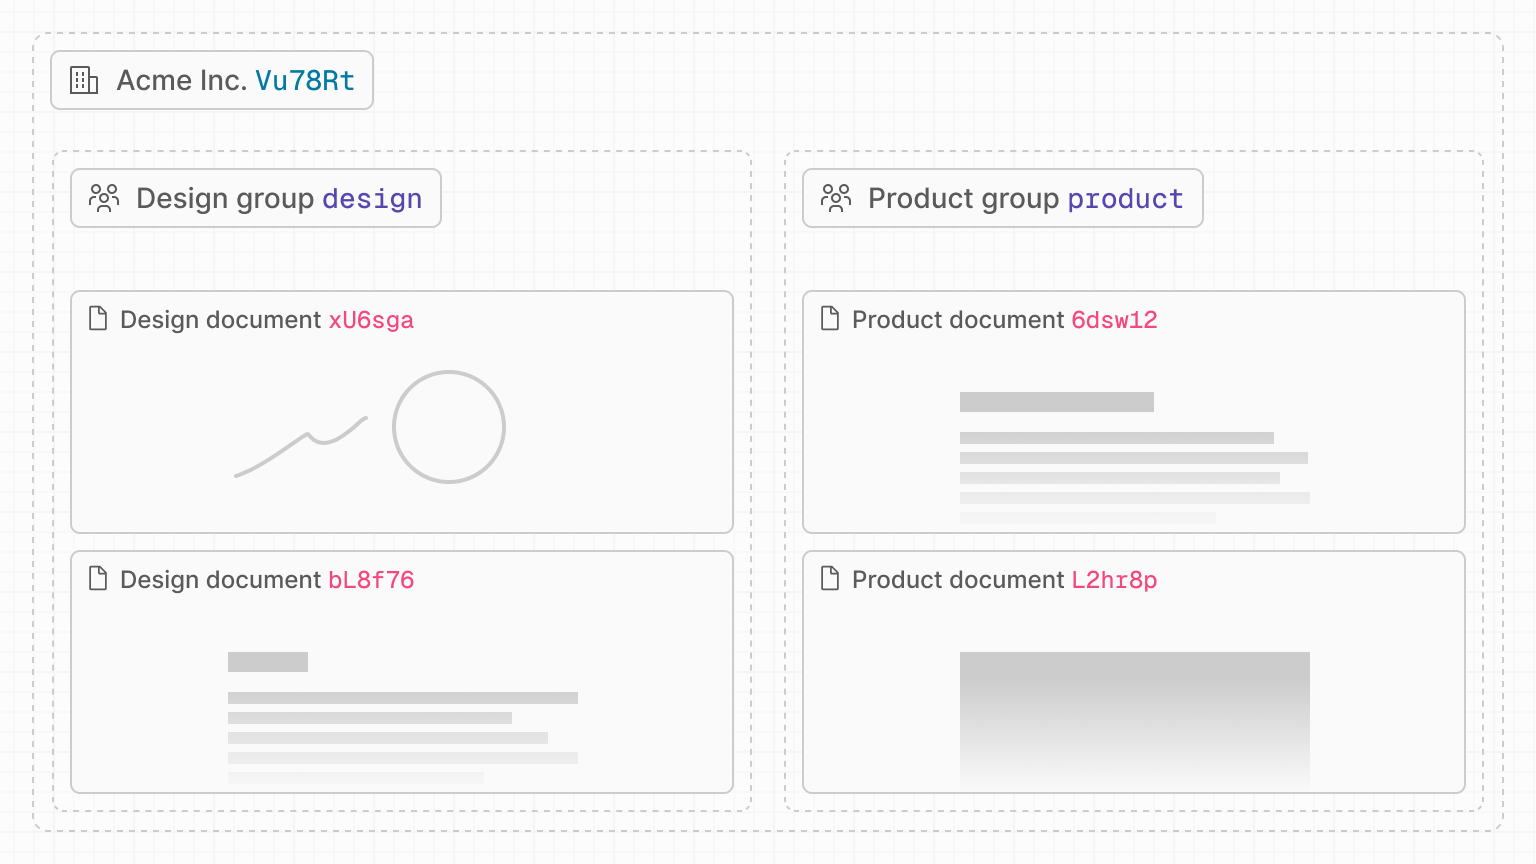

In your application, each group and document has a unique ID, and we can use
these to create a naming pattern for your rooms. For example, in the diagram
above, the Acme organization has a Product group (product) with two documents
inside (6Dsw12, L2hr8p).
Naming pattern
An example of a naming pattern would be to combine these IDs into a unique room
ID separating them with symbols, such as <group_id>:<document_id>. A room ID
following this pattern may look like product:6Dsw1z.
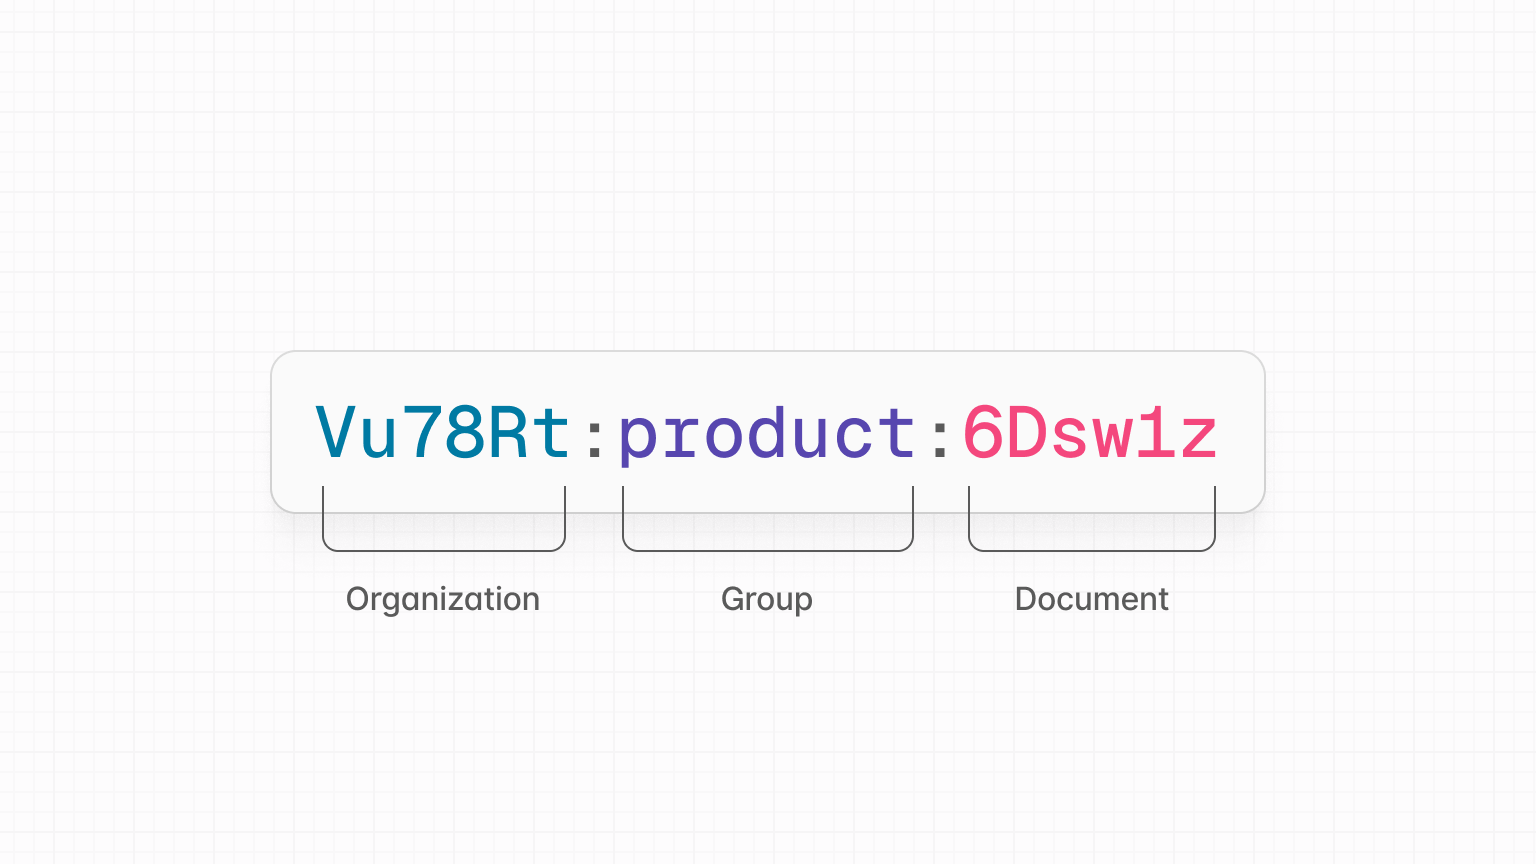
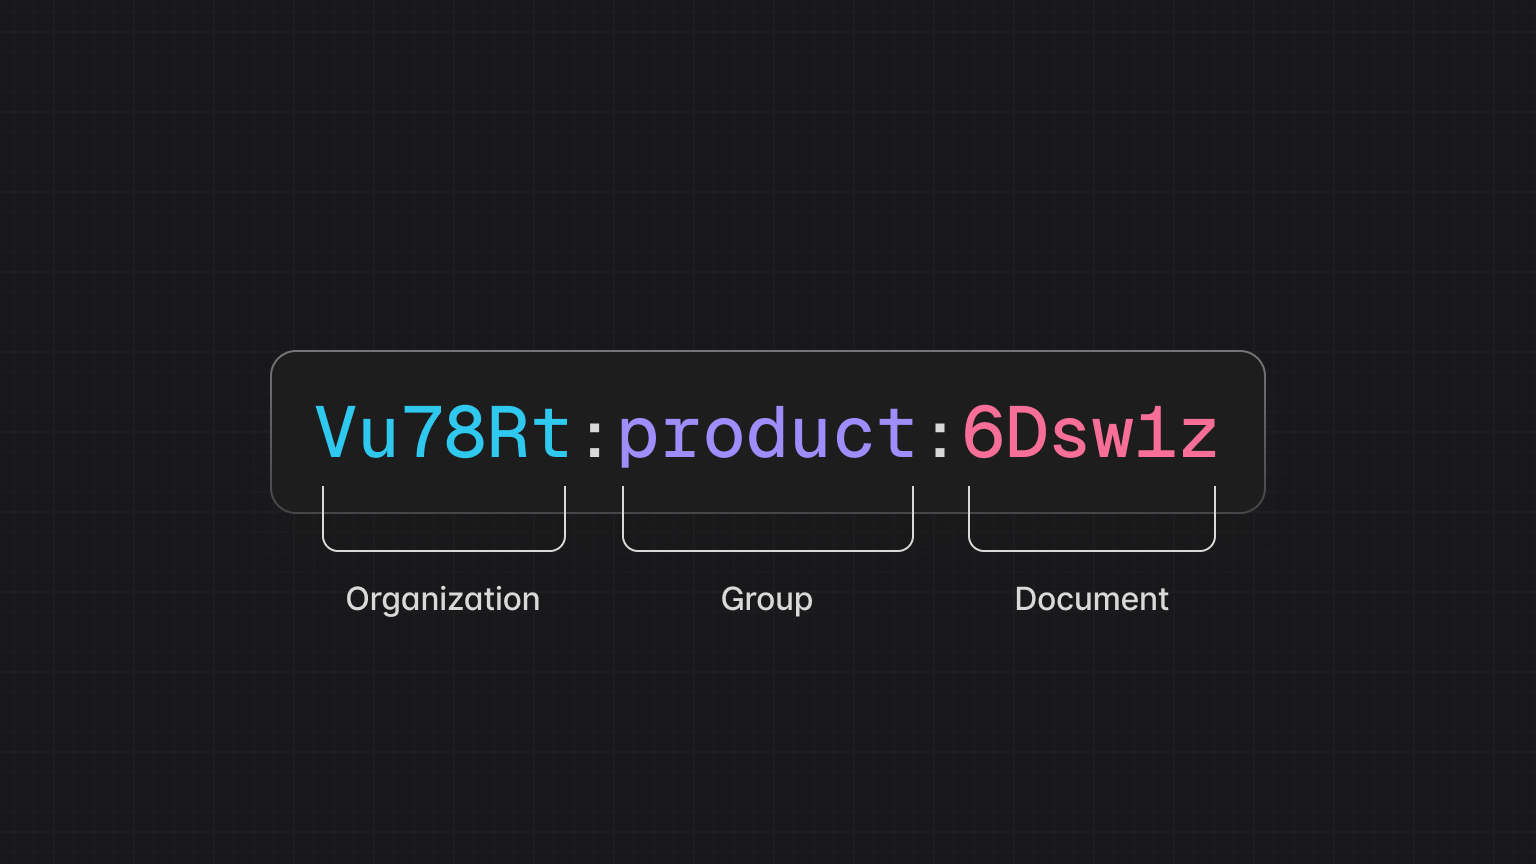
This example is not a strict naming pattern you must follow, and you can use any pattern you like. Take care to avoid using your separator character in any other part of the room ID.
Wildcard permissions
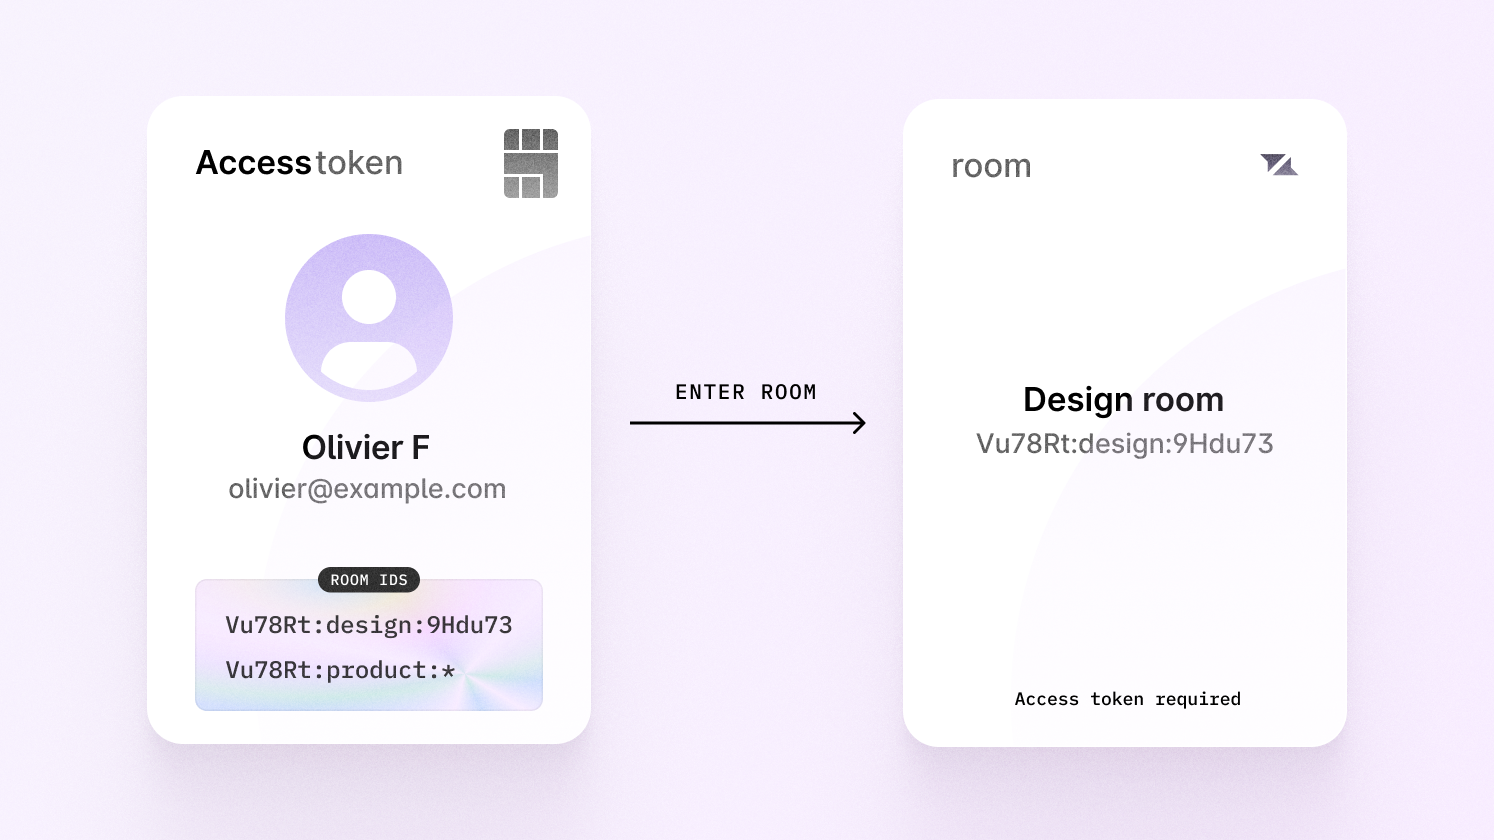
Assuming you’re using the naming pattern displayed above, you can then grant access to multiple rooms at once using wildcards.
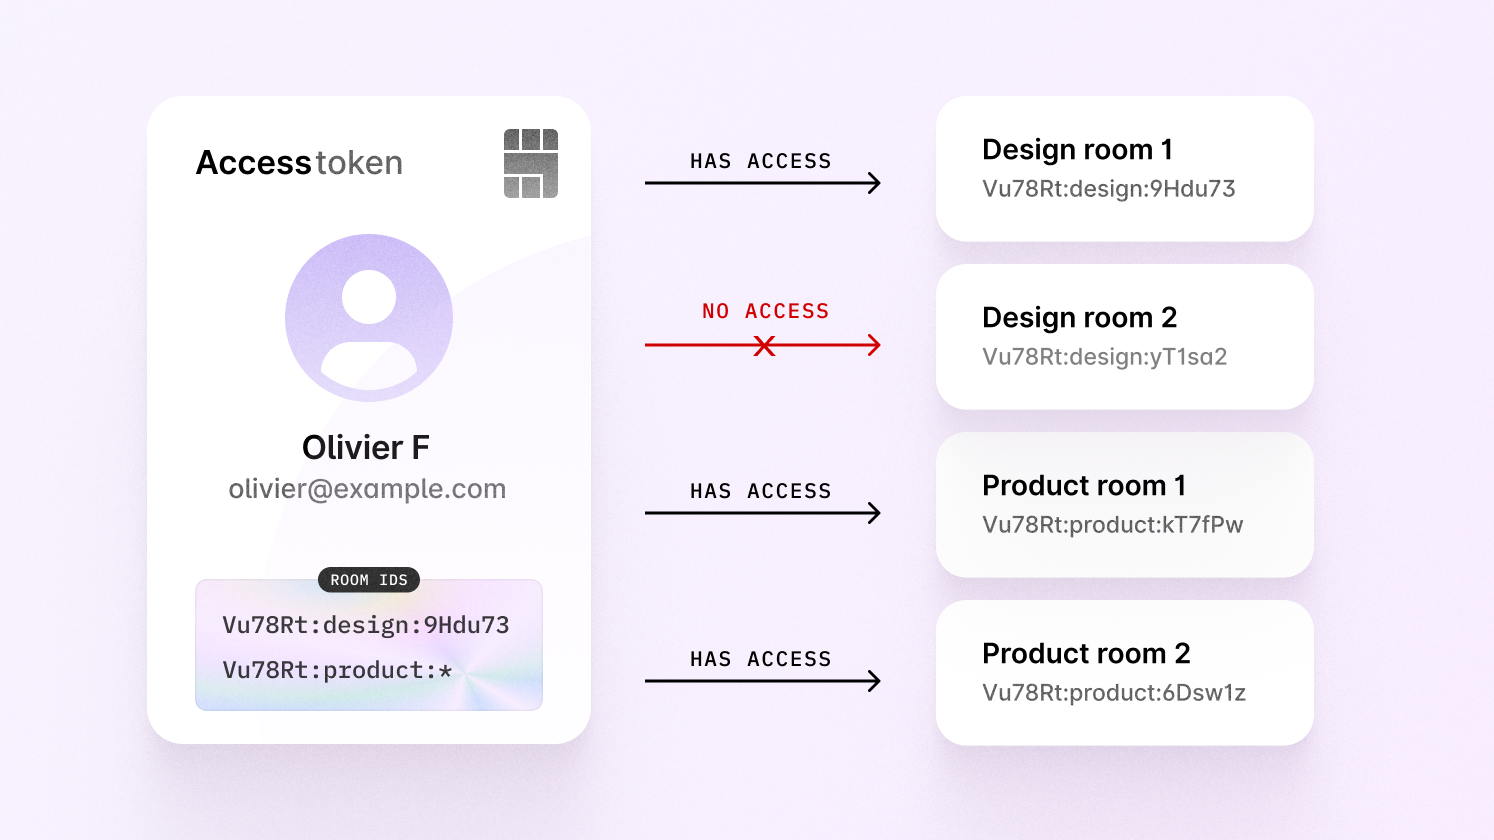
In the image above, you can see that Olivier has access to multiple product
rooms, thanks to the product:* wildcard rule. This is how he was authorized:
Note that you can only use a wildcard at the end of a room ID.
Read-only access
Should we wish to grant read-only access to each room, we then add another line to enable this.
Limitations
There's a limitation with access tokens related to granting access to individual
rooms that are part of groups. Let's say a user has been given access to every
product room in their organizations.
This user is able to enter product rooms, but has no access to any design
rooms.
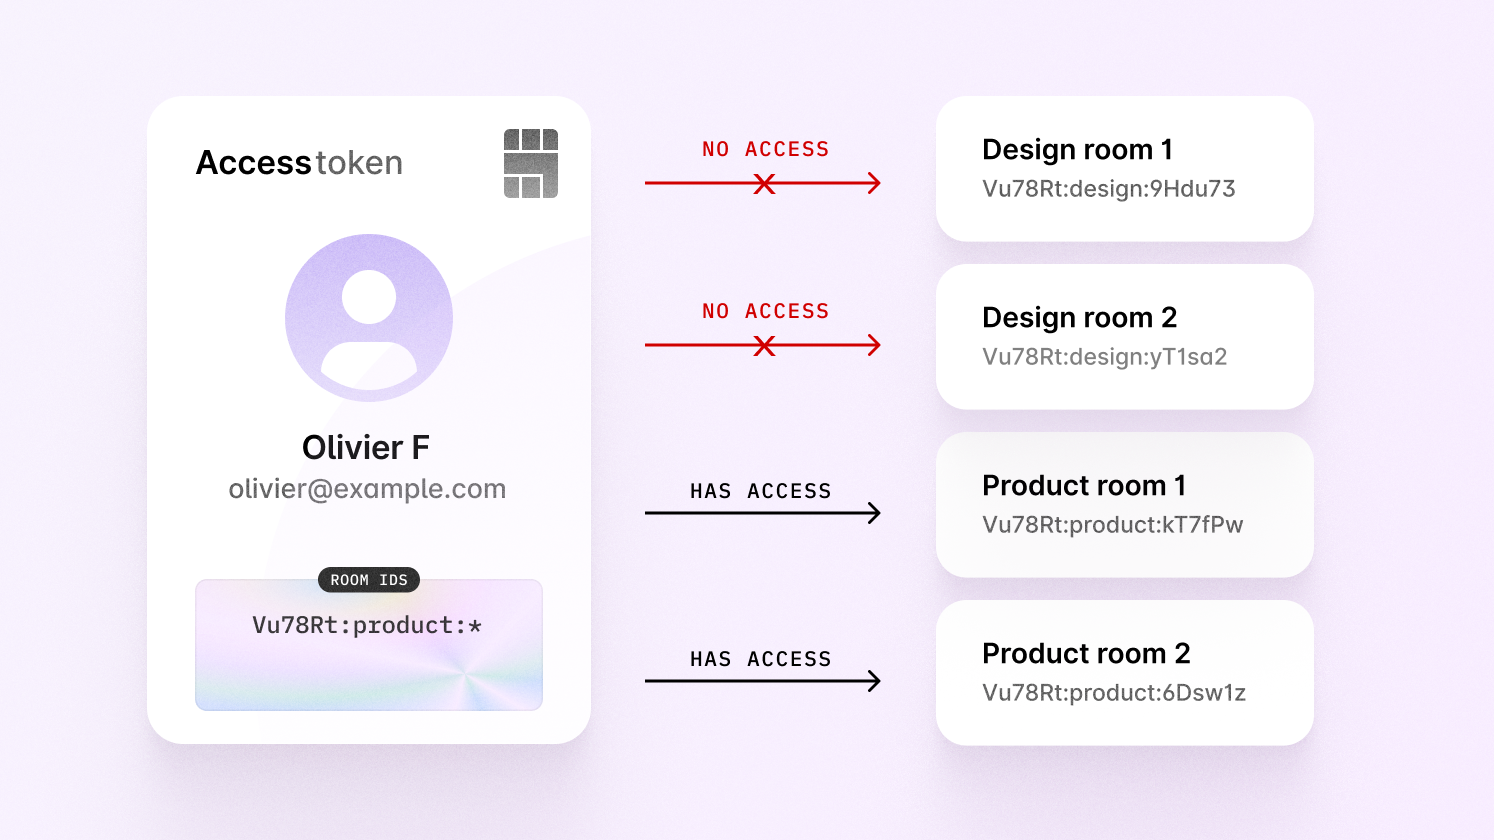
Let’s say the user is invited to a design room via share menu—how would we
grant them access?
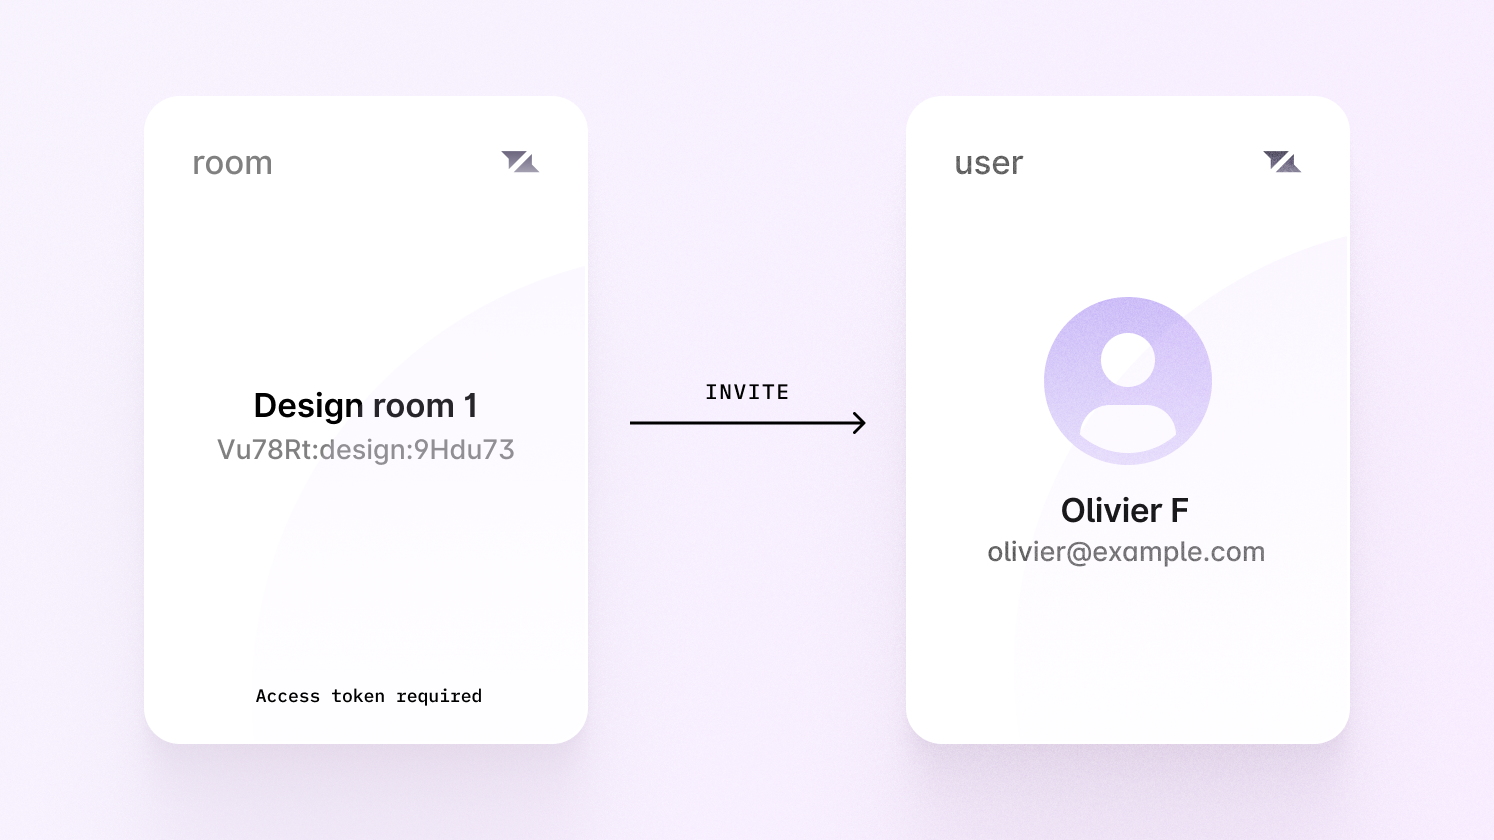
We can’t give them access to every design room with a wildcard, as they
should only have permission for one.
Instead, we would have to manually find the exact room ID without a wildcard, and apply it ourselves—the naming pattern doesn’t work for this room.
To use access tokens you’d have to manually keep track of every room ID where the naming pattern doesn’t apply. This isn’t ideal, and it also doesn’t scale, as the token will need to be refreshed whenever access is granted to new rooms for this to work correctly.
Building complex permissions
For this reason, we recommend using ID tokens for complex permissions. ID token authentication allows you to attach permissions to each room when it’s created or modified, which means you don’t need to check permissions yourself, and no naming pattern is required.
Migrating your current rooms IDs
If your application already has rooms, it’s possible to rename their IDs to be compatible with a naming pattern. Learn more in our room ID migration guide.
Select your framework
Select your framework for specific instructions on setting up access token authentication.