Sign in

Get started with AI agent notifications using Liveblocks and Next.js

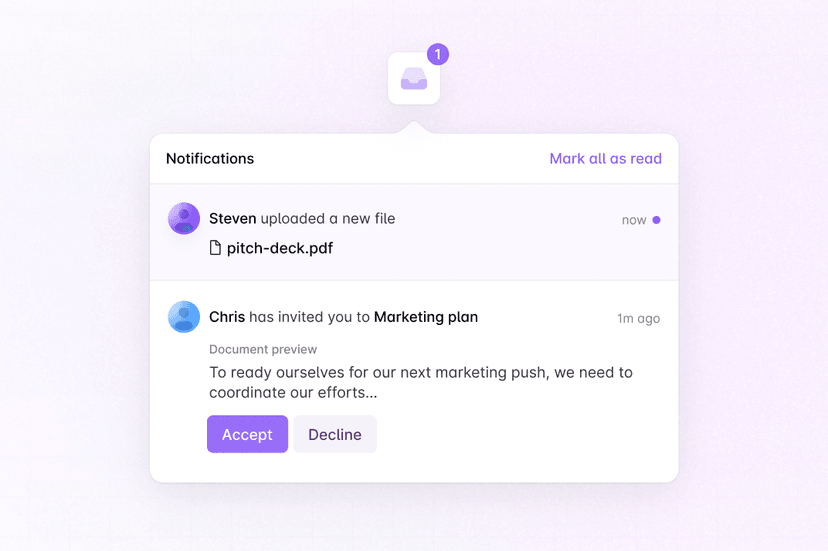
Liveblocks is a realtime collaboration infrastructure for building performant collaborative experiences. Follow this guide to create an inbox notification system in your app, and notify users when an AI agent has completed its work. This uses a Next.js /app directory application, with the hooks from @liveblocks/react, the components from @liveblocks/react-ui, and @liveblocks/node on the server.

Quickstart

  1. Install Liveblocks

    Every package should use the same version.

    Terminal
    npm install @liveblocks/client @liveblocks/react @liveblocks/react-ui @liveblocks/node
  2. Initialize the liveblocks.config.ts file

    We can use this file later to define types for our application.

    Terminal
    npx create-liveblocks-app@latest --init --framework react
  3. Add your secret key

    Create a .env.local file and add your Liveblocks secret key from the dashboard.

    .env.local
    LIVEBLOCKS_SECRET_KEY=""
  4. Set up authentication

    Create an authentication API route with identifyUser, passing a unique user ID.

    app/api/liveblocks-auth/route.ts
    import { Liveblocks } from "@liveblocks/node";
    const liveblocks = new Liveblocks({ secret: process.env.LIVEBLOCKS_SECRET_KEY!,});
    export async function POST(request: Request) { // Get the current user from your database const user = (request);
    // Identify the user and return the result const { status, body } = await liveblocks.identifyUser( { userId: user.id }, { userInfo: { name: user.name, avatar: user.avatar, }, }, );
    return new Response(body, { status });}
  5. Create a Liveblocks provider

    Liveblocks Notifications uses the concept of projects, which relate to projects in your dashboard. Notifications are sent between users in the same project. To connect and receive notifications, you must add LiveblocksProvider to a client component in your app.

    app/Providers.tsx
    "use client";
    import { ReactNode } from "react";import { LiveblocksProvider } from "@liveblocks/react";
    export function Providers({ children }: { children: ReactNode }) { return ( <LiveblocksProvider authEndpoint="/api/liveblocks-auth"> {children} </LiveblocksProvider> );}
  6. Add the provider to your layout

    After creating your provider file, it’s time to use it. Import your room into your layout.tsx file.

    app/layout.tsx
    import { Providers } from "./Providers";
    export default function Layout({ children }) { return ( <html> <body> <Providers> {children} </Providers> </body> </html> );}
  7. Use the Liveblocks hooks and components

    Now that we’ve set up the provider, we can start using the Liveblocks hooks and components. We’ll add useInboxNotifications to get the current project’s notifications, then we’ll use InboxNotification and InboxNotificationList to render them.

    app/page.tsx
    "use client";
    import { useInboxNotifications } from "@liveblocks/react/suspense";import { InboxNotification, InboxNotificationList,} from "@liveblocks/react-ui";
    export default function Page() { const { inboxNotifications } = useInboxNotifications();
    return ( <InboxNotificationList> {inboxNotifications.map((inboxNotification) => ( <InboxNotification key={inboxNotification.id} inboxNotification={inboxNotification} /> ))} </InboxNotificationList> );}
  8. Import default styles

    The default components come with default styles, you can import them into the root layout of your app or directly into a CSS file with @import.

    app/layout.tsx
    import "@liveblocks/react-ui/styles.css";
  9. Notify the user when your agent completes

    Trigger a notification with triggerInboxNotification from a server action or route handler at the end of your agent’s work. In this example, a custom $agentCompleted notification is sent once the agent has finished a task.

    app/run-agent.ts
    "use server";
    import { Liveblocks } from "@liveblocks/node";
    const liveblocks = new Liveblocks({ secret: process.env.LIVEBLOCKS_SECRET_KEY!,});
    export async function runAgent({ userId, task,}: { userId: string; task: string;}) { const startedAt = Date.now();
    // Run your AI agent here, e.g. generateText, mutateFlow, … await ({ task });
    // Notify the user that the agent has finished await liveblocks.triggerInboxNotification({ userId, kind: "$agentCompleted", subjectId: `agent-${task}`, activityData: { task, status: "complete", durationMs: Date.now() - startedAt, }, });}
  10. Render the agent notification

    After triggering the custom notification, modify InboxNotification to render $agentCompleted with custom UI.

    app/page.tsx
    "use client";
    import { useInboxNotifications } from "@liveblocks/react/suspense";import { InboxNotification, InboxNotificationList,} from "@liveblocks/react-ui";
    export default function Page() { const { inboxNotifications } = useInboxNotifications();
    return ( <InboxNotificationList> {inboxNotifications.map((inboxNotification) => ( <InboxNotification key={inboxNotification.id} inboxNotification={inboxNotification} kinds={{ $agentCompleted: (props) => ( <InboxNotification.Custom {...props} title="Agent finished" aside={<InboxNotification.Icon></InboxNotification.Icon>} > Your agent finished working on{" "} <b>{props.inboxNotification.activities[0].data.task}</b>. </InboxNotification.Custom> ), }} /> ))} </InboxNotificationList> );}
  11. Next: add your users

    Notifications is set up and working now, but the auth route is using a placeholder user—the next step is to connect it to your real users, and attach their name and avatar to their notifications.

    Add your users to Notifications

What to read next

Congratulations! You’ve set up notifications that fire when your AI agent finishes its work.

Examples using Notifications