How to add users to Liveblocks Notifications
After following the get started guide for Notifications, and sending notifications with Comments or Text editor, you’ll notice that each user is currently “Anonymous”, and that there’s no way to mention or tag other users. To enable these features, we need to tell Notifications where to find your users’ information.
What we’re learning
In this guide we’ll be modifying
LiveblocksProvider,
learning how to:
- Add names and avatars to notifications with
resolveUsers.
Authenticate your application
The first step is to find an authentication guide for your framework and authenticate your app, as this is necessary for Notifications.
Make sure to follow the metadata step in the guide, and attach the name of your user, along with the URL of their avatar, as these properties will both be used in the default components. Here’s an example using ID token authentication, our recommended method, with an email address as a user’s ID.
Modify your UserMeta type in liveblocks.config.ts to match the metadata
format, adding type hints to your editor.
Resolving users
To show each user’s name and avatar in threads and comments, we need to use
resolveUsers.
Add the function to your LiveblocksProvider
The
resolveUsersfunction is passed as an option toLiveblocksProvider—let’s add it. This function provides you withuserIds, an array of user IDs that have interacted with Notifications. TheseuserIdsmatch the IDs set when authenticating users in your app.Return your users
resolveUsersrequires you to return a list of users in theUserMeta["info"]format we set earlier. Remember that name and avatar are required for the default components, but you can also use any other metadata in your app.We’re only returning one user here, but make sure to return an array containing each user, in the same order you received the IDs.
Real-world example
In your real application you’ll probably be getting users from your API endpoint and database via
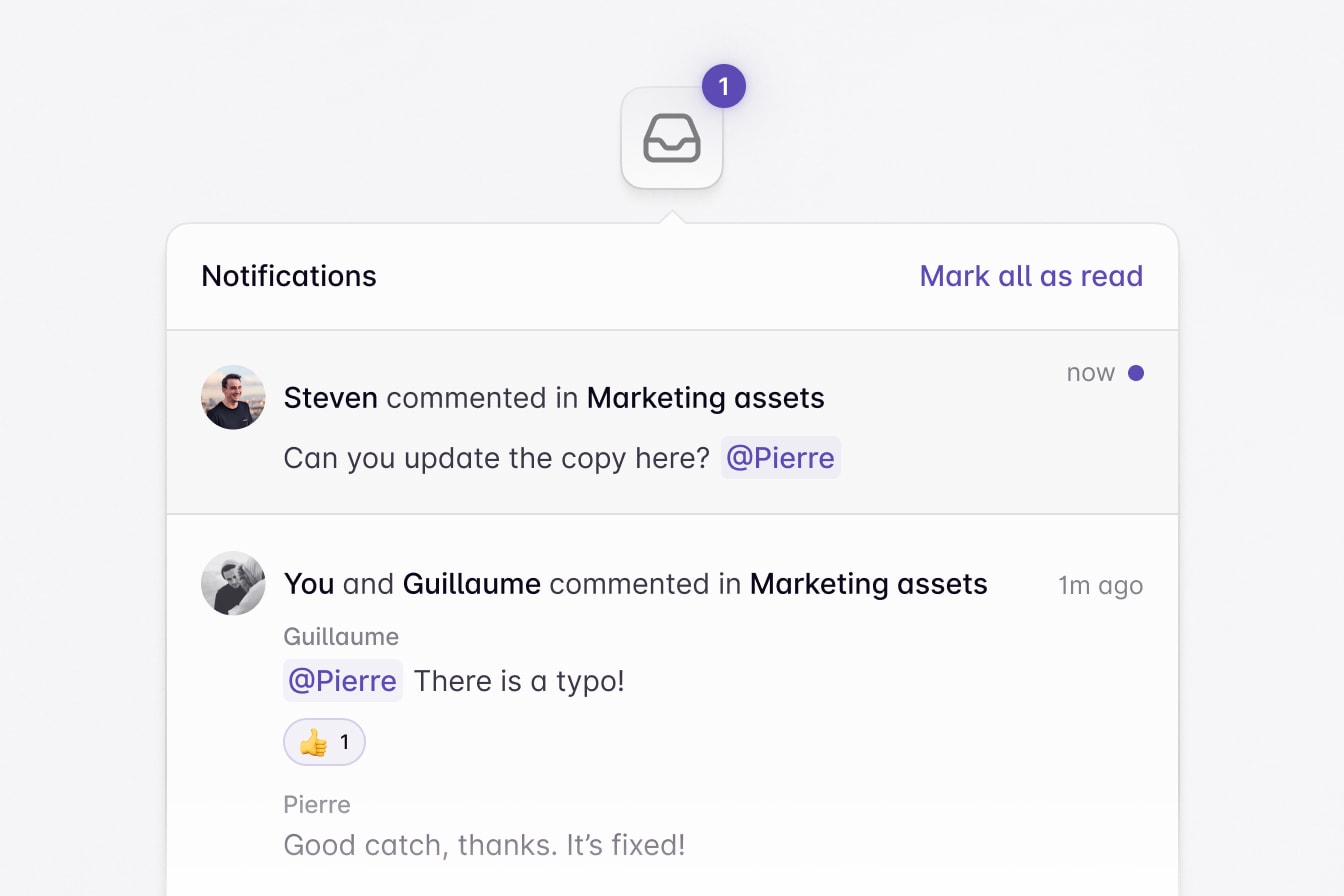
fetch. This is how we’d recommend building out this function.Users are now visible
After adding this, you should now be able to see your users in notifications!
Next steps
You’re now ready to start building your Notifications application! Here’s where you can learn more: