Set up ID token permissions with Firebase
Follow the following steps to start configure your authentication endpoint and start building your own security logic.
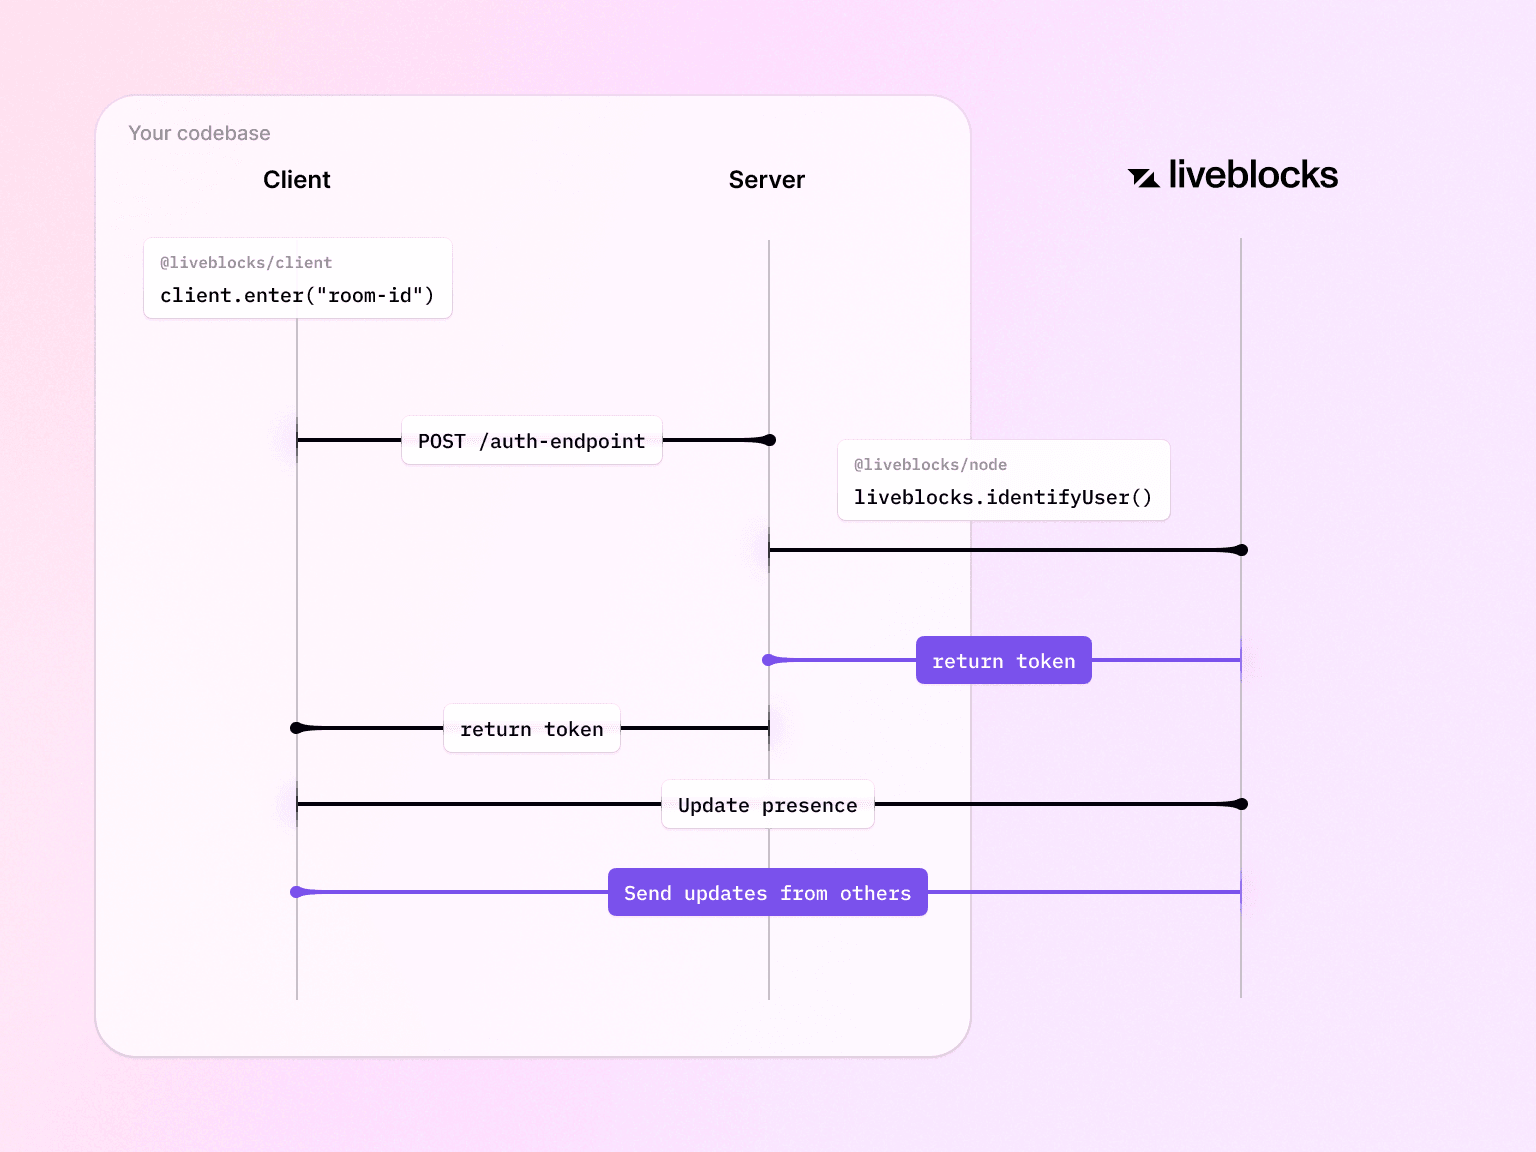
Quickstart
Install the
liveblocks/nodepackageLet’s first install the
@liveblocks/nodepackage in your Firebase functions project.TerminalSet up authentication endpoint
Create a new Firebase callable function as shown below. This is where you will implement your security and define if the current user has access to a specific room.
Set up the client
On the front end, you can now replace the
publicApiKeyoption withauthEndpointpointing to the endpoint you just created.Set permission accesses to a room
A room can have
defaultAccesses,usersAccesses, andgroupsAccessesdefined. Permissions are then checked when users try to connect to a room. For security purposes, room permissions can only be set on the back-end through@liveblocks/nodeor our REST API. For instance, you can useliveblocks.createRoomto create a new room with read-only public access levels while giving write access to specific groups and users.For more information, make sure to read the section on room permissions.
More information
Both userId and userInfo can then be used in your JavaScript application as
such: