Get started with commenting using Liveblocks and Next.js
Liveblocks is a realtime collaboration infrastructure for building performant
collaborative experiences. Follow the following steps to start adding a
commenting experience to your Next.js /app directory application using the
hooks from @liveblocks/react and the
components from
@liveblocks/react-ui.
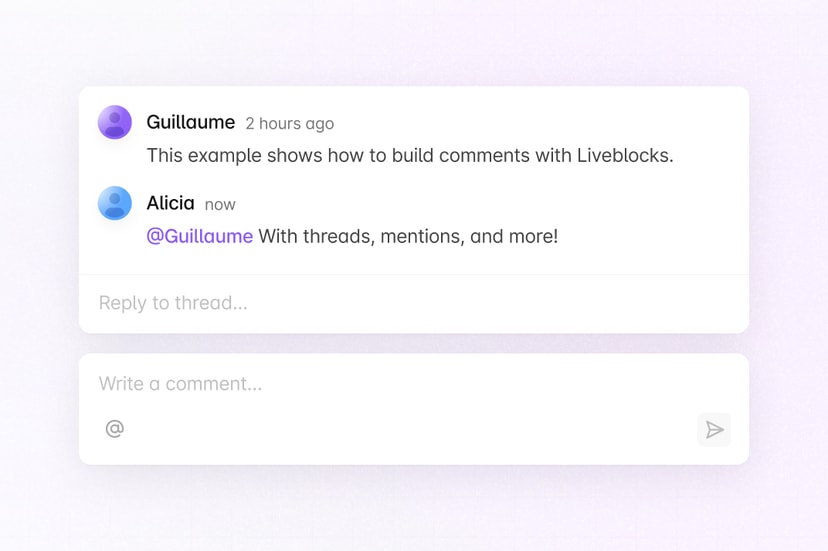
See the finished result in the Comments example.
Quickstart
Install Liveblocks
Every package should use the same version.
TerminalInitialize the
liveblocks.config.tsfileWe can use this file later to define types for our application.
TerminalCreate a Liveblocks room
Liveblocks uses the concept of rooms, separate virtual spaces where people collaborate, and to create a realtime experience, multiple users must be connected to the same room. When using Next.js’
/approuter, we recommend creating your room in aRoom.tsxfile in the same directory as your current route.Set up a Liveblocks client with
LiveblocksProvider, join a room withRoomProvider, and useClientSideSuspenseto add a loading spinner to your app.app/Room.tsxAdd the Liveblocks room to your page
After creating your room file, it’s time to join it. Import your room into your
page.tsxfile, and place your collaborative app components inside it.app/page.tsxUse the Liveblocks hooks and components
Now that we’re connected to a room, we can start using the Liveblocks hooks and components. We’ll add
useThreadsto get the threads in the room, then we’ll use theThreadcomponent to render them. Finally, we’ll add a way to create threads by adding aComposer.app/CollaborativeApp.tsxImport default styles
The default components come with default styles, you can import them into the root layout of your app or directly into a CSS file with
@import.app/layout.tsxNext: authenticate and add your users
Comments is set up and working now, but each user is anonymous—the next step is to authenticate each user as they connect, and attach their name and avatar to their comments.
Add your users to Comments
What to read next
Congratulations! You’ve set up the foundation to start building a commenting experience for your Next.js application.
- API Reference
- Overview
- How to add AI replies to comments
- How to send email notifications when comments are created