What's new in v1.2
With this release, we're introducing new flexible authentication methods to handle permissions for your collaborative application, leading to improved performance and developer experience.

With this release, we're introducing new flexible authentication methods to handle permissions for your collaborative application, leading to improved performance and developer experience.
With Liveblocks 1.2, we’re introducing new flexible authentication methods to handle permissions for your collaborative application. Not only do these new authentication methods improve loading performance significantly, they also make it much easier to integrate Liveblocks into existing permission systems without having to synchronize Liveblocks rooms every time permissions are updated.
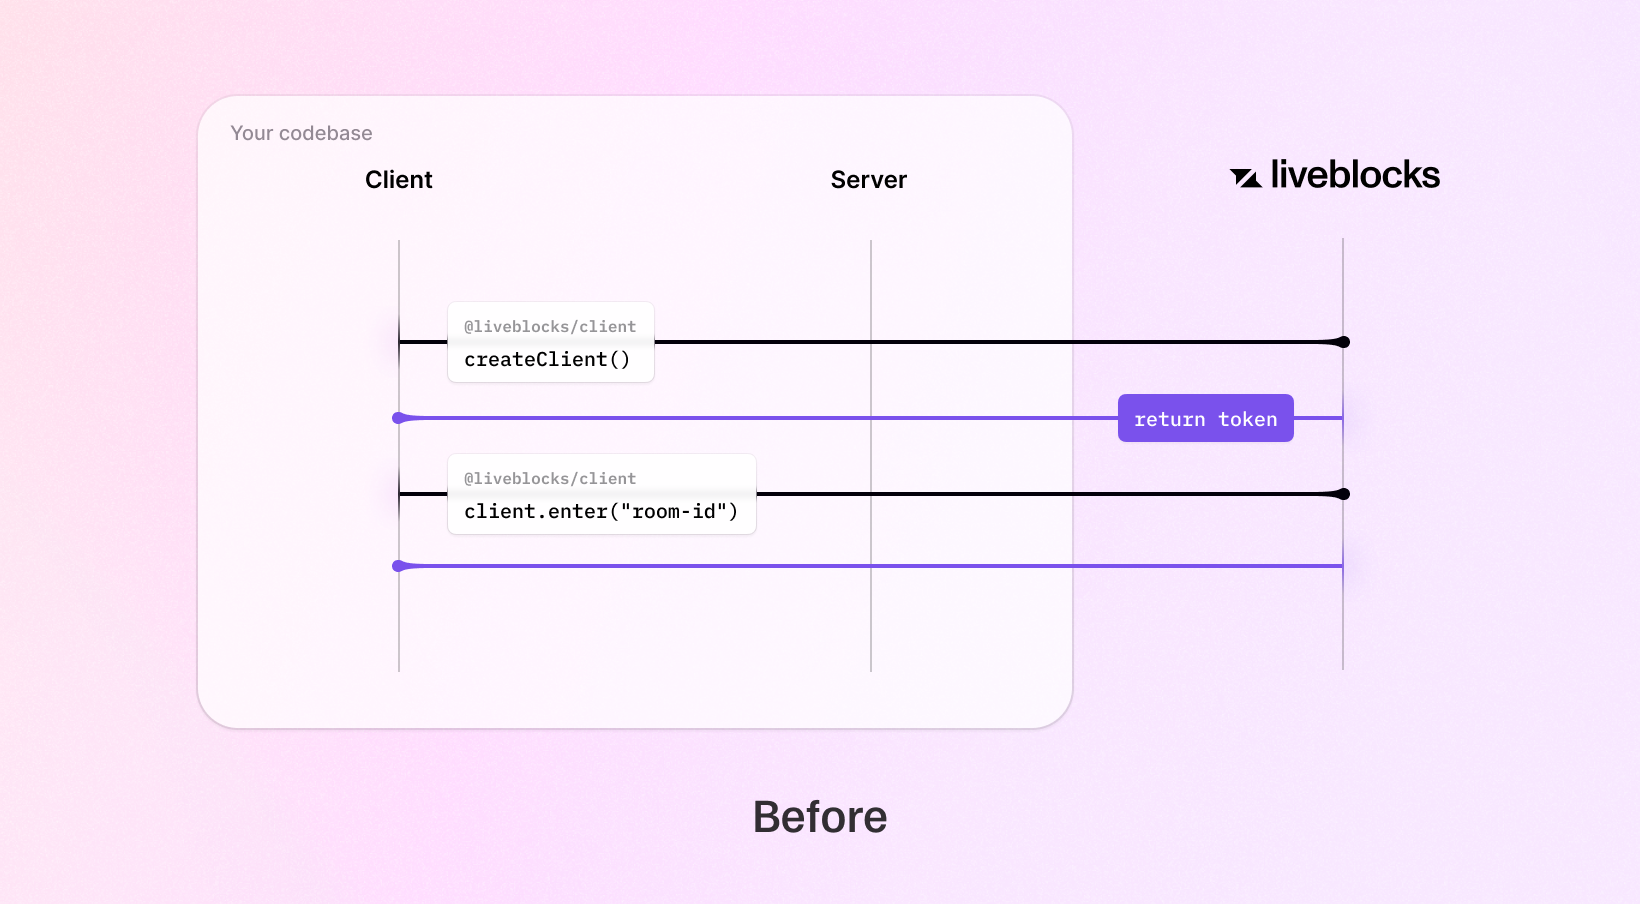
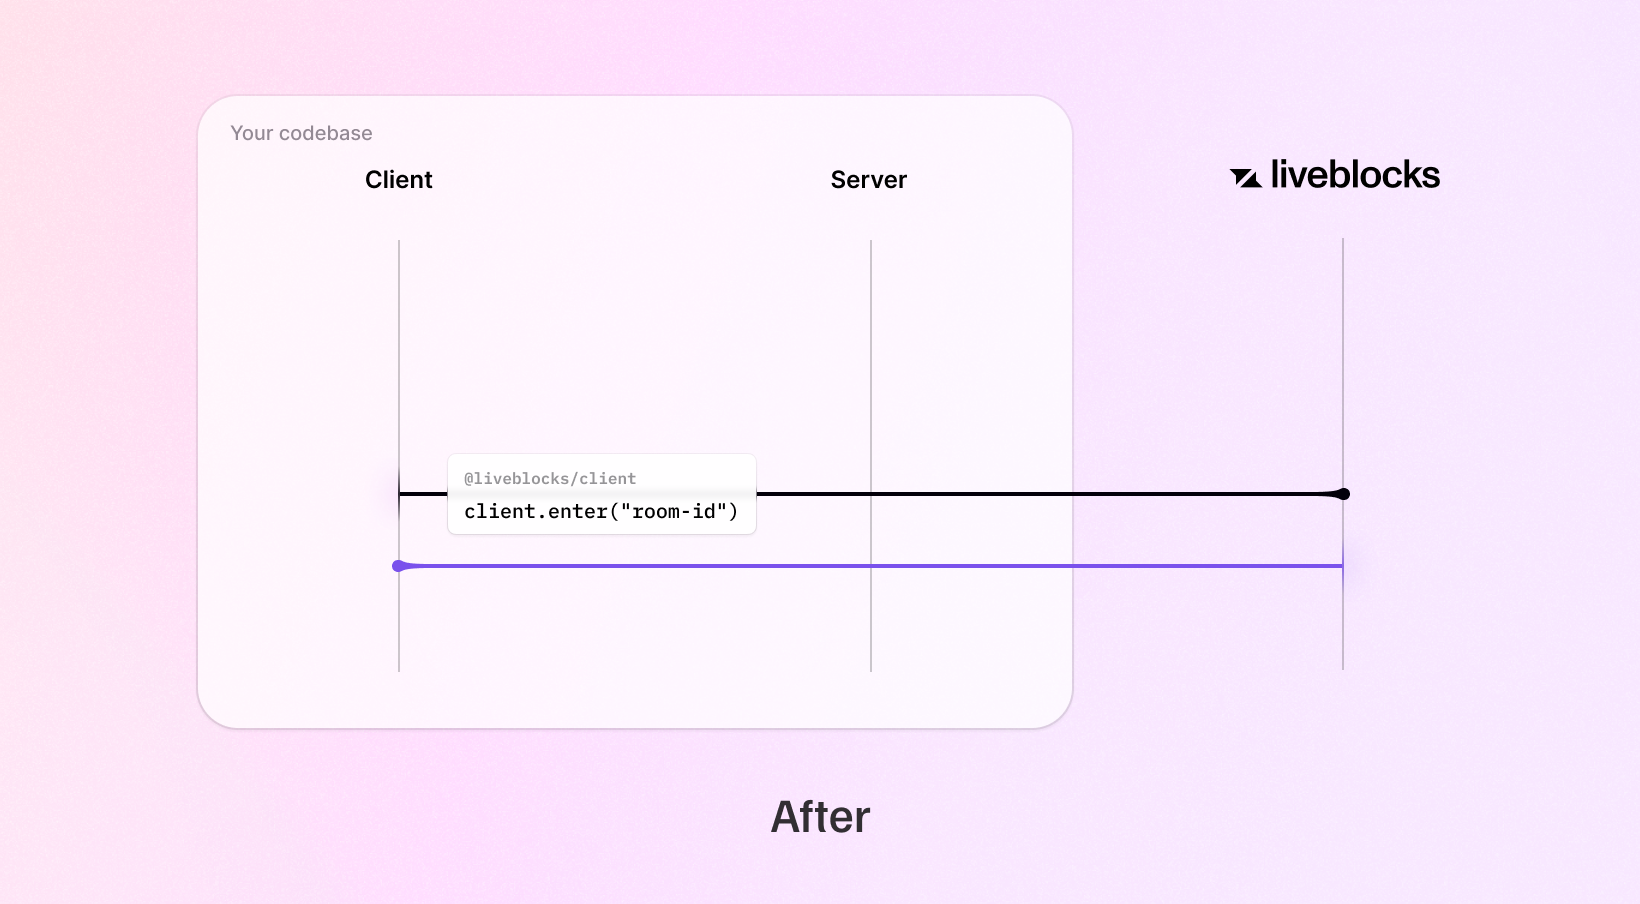
No changes are required if you’re currently using Liveblocks public keys, but you’ll notice a significant performance improvement when connecting to collaborative rooms. We’ll share more on this below.
We’re introducing two new ways to handle permissions with secret keys:
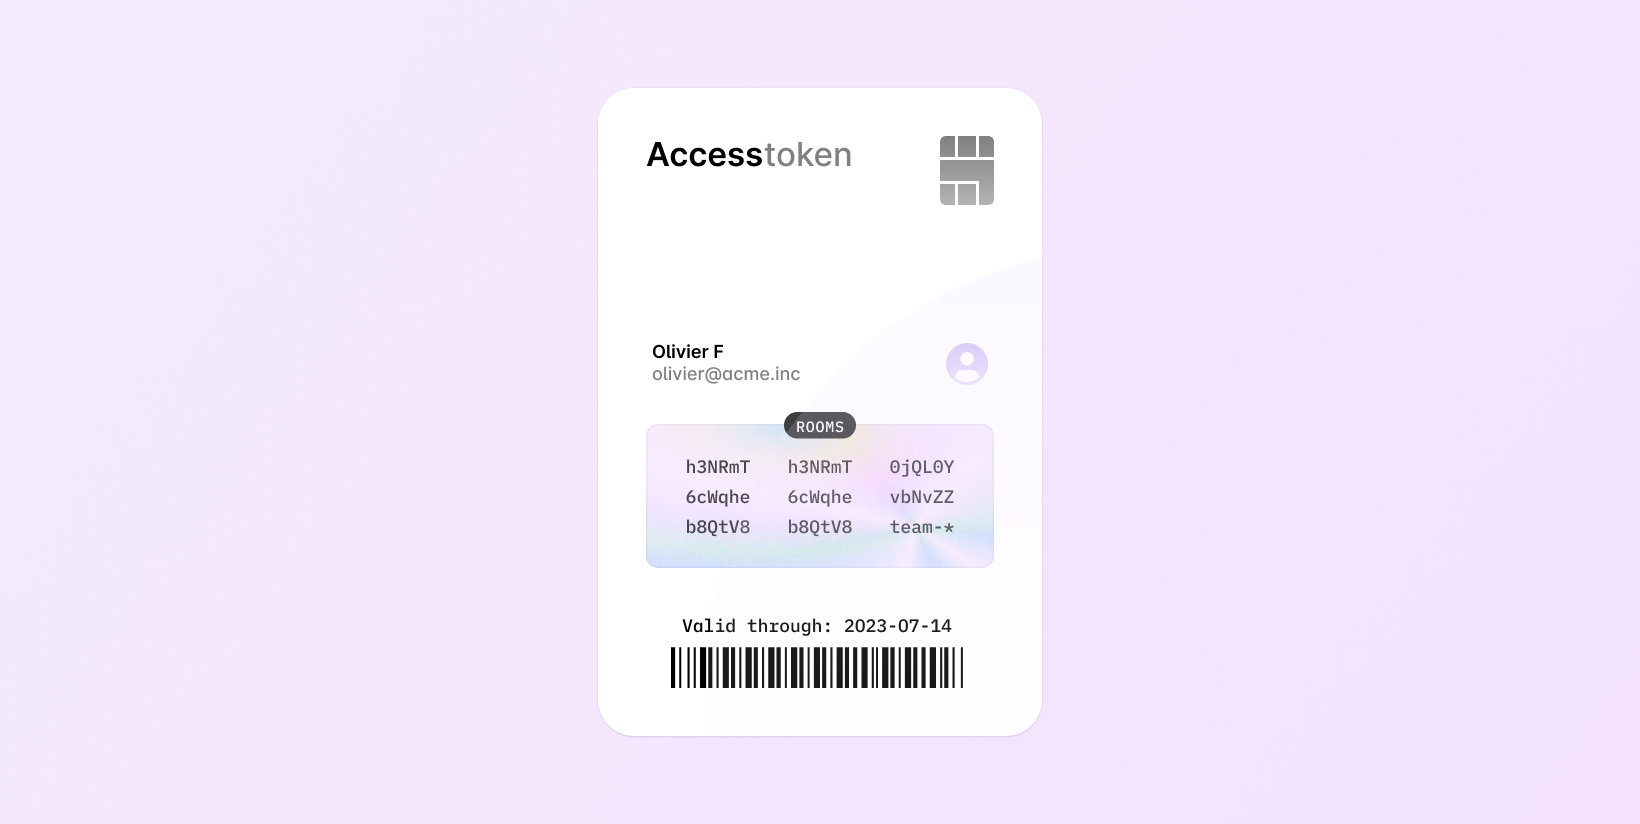
Access tokens contain embedded permissions and metadata about the current user. If you already have your own permission system, we recommend this approach as it will allow you to set specific access to multiple rooms from one spot—without having to synchronize permissions with Liveblocks.
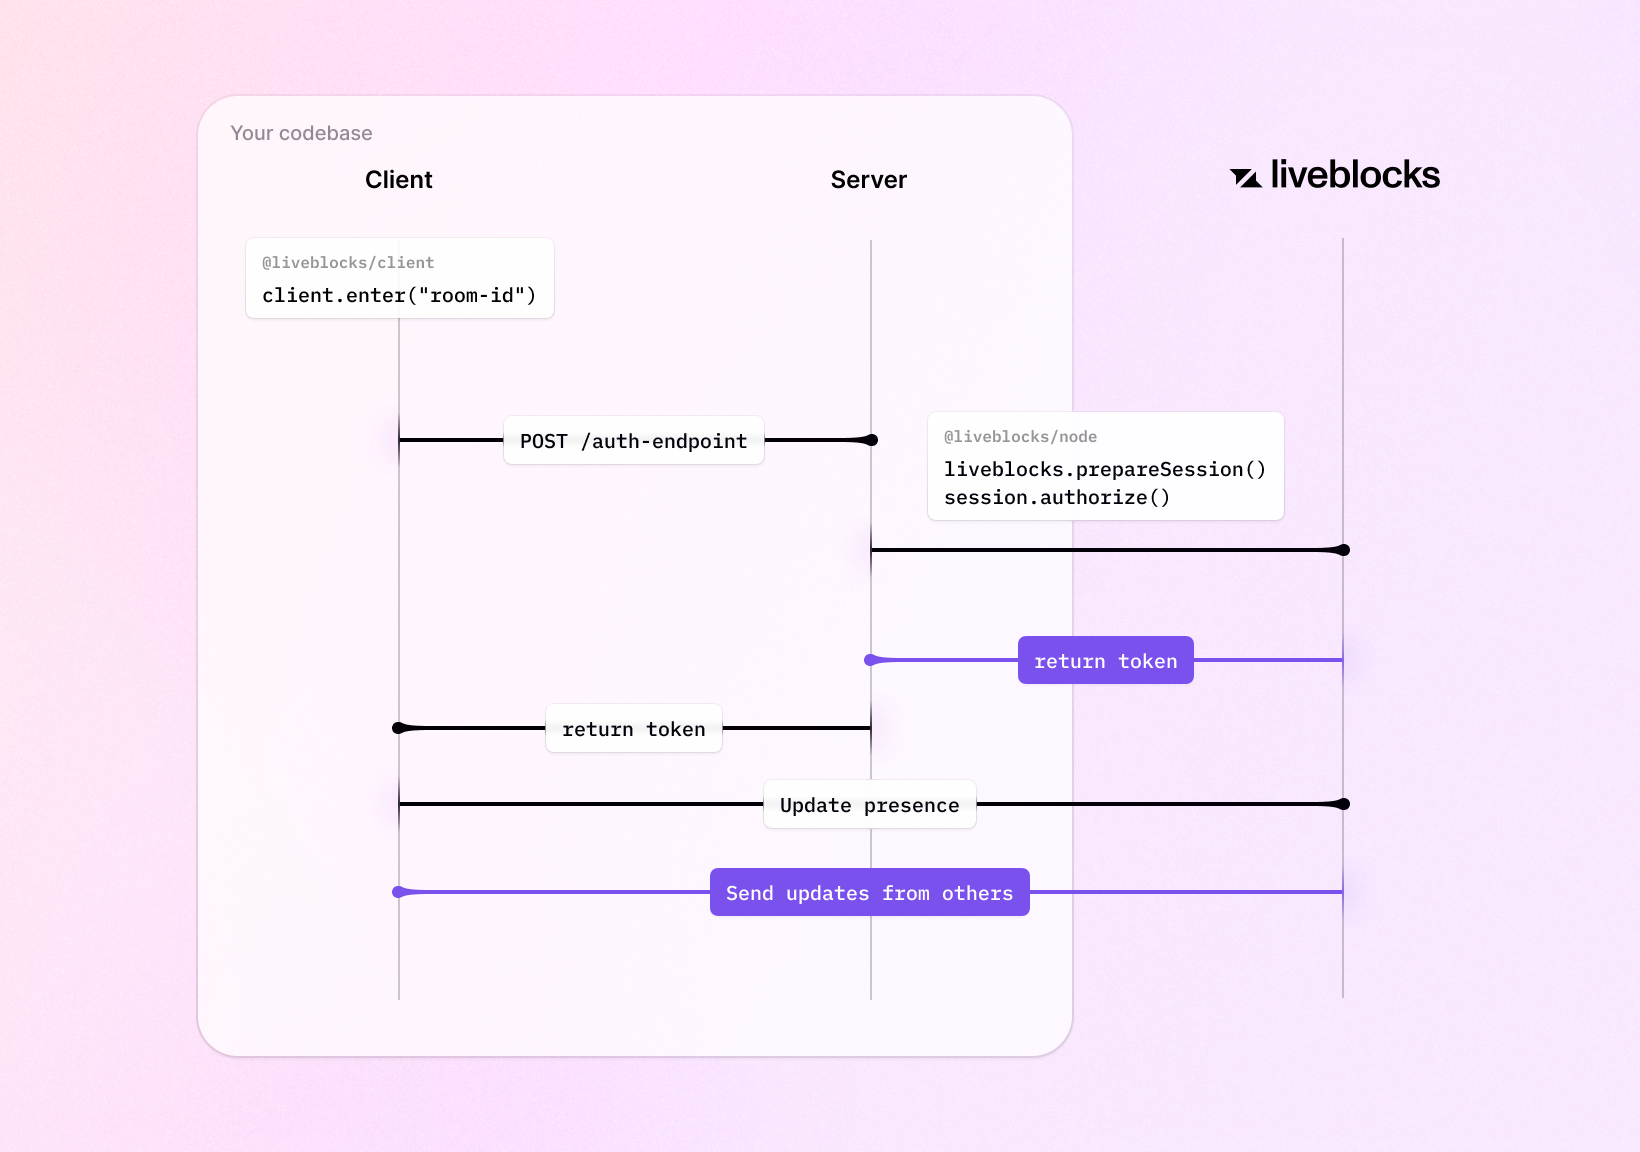
Here is what a standard Liveblocks authentication endpoint leveraging the access token approach would look like in a Next.js application:
And what’s powerful about this approach is that you can allow access up to
multiple rooms at once within a given session.
Make sure to check out the authentication step-by-step docs to set it up for your application.
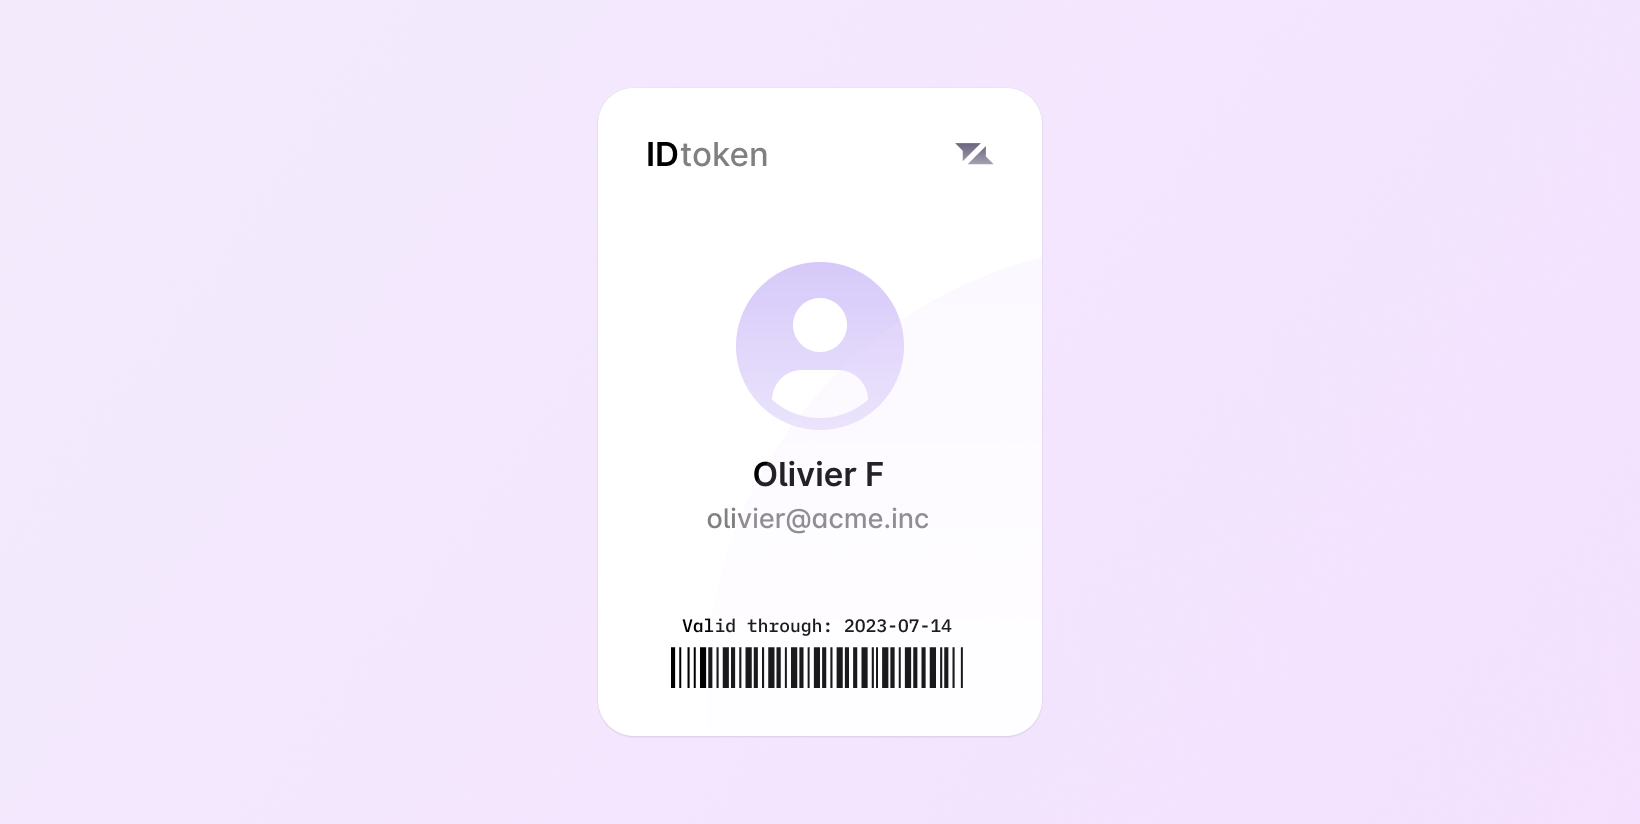
ID tokens act as a verified ID representation of a user. With this approach, permissions must be set at the room level so that ID tokens can be checked upon entry, making sure the given user has access to the room. The Liveblocks servers perform this authorization, so your permissions need to be set up front using the Liveblocks REST API.
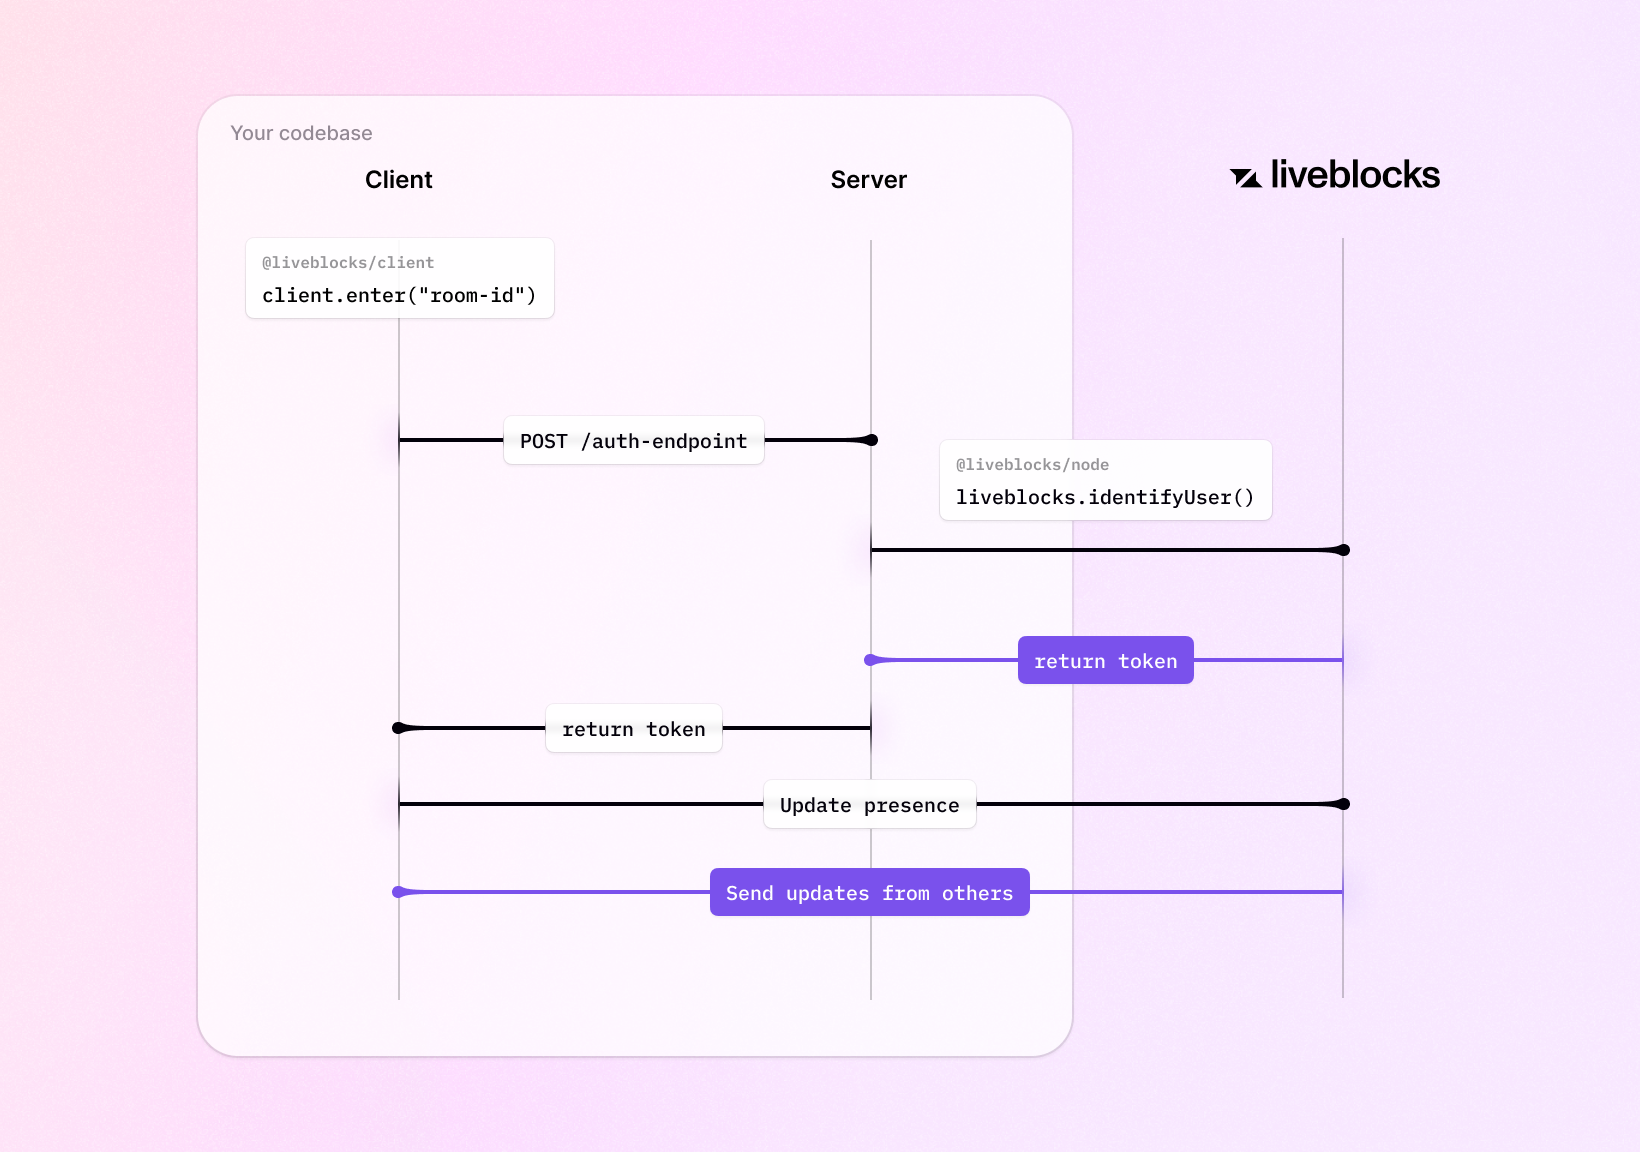
Here’s an example of a Liveblocks authentication endpoint in Next.js which implements the ID token approach:
Make sure to check out the authentication step-by-step docs to set it up for your application.
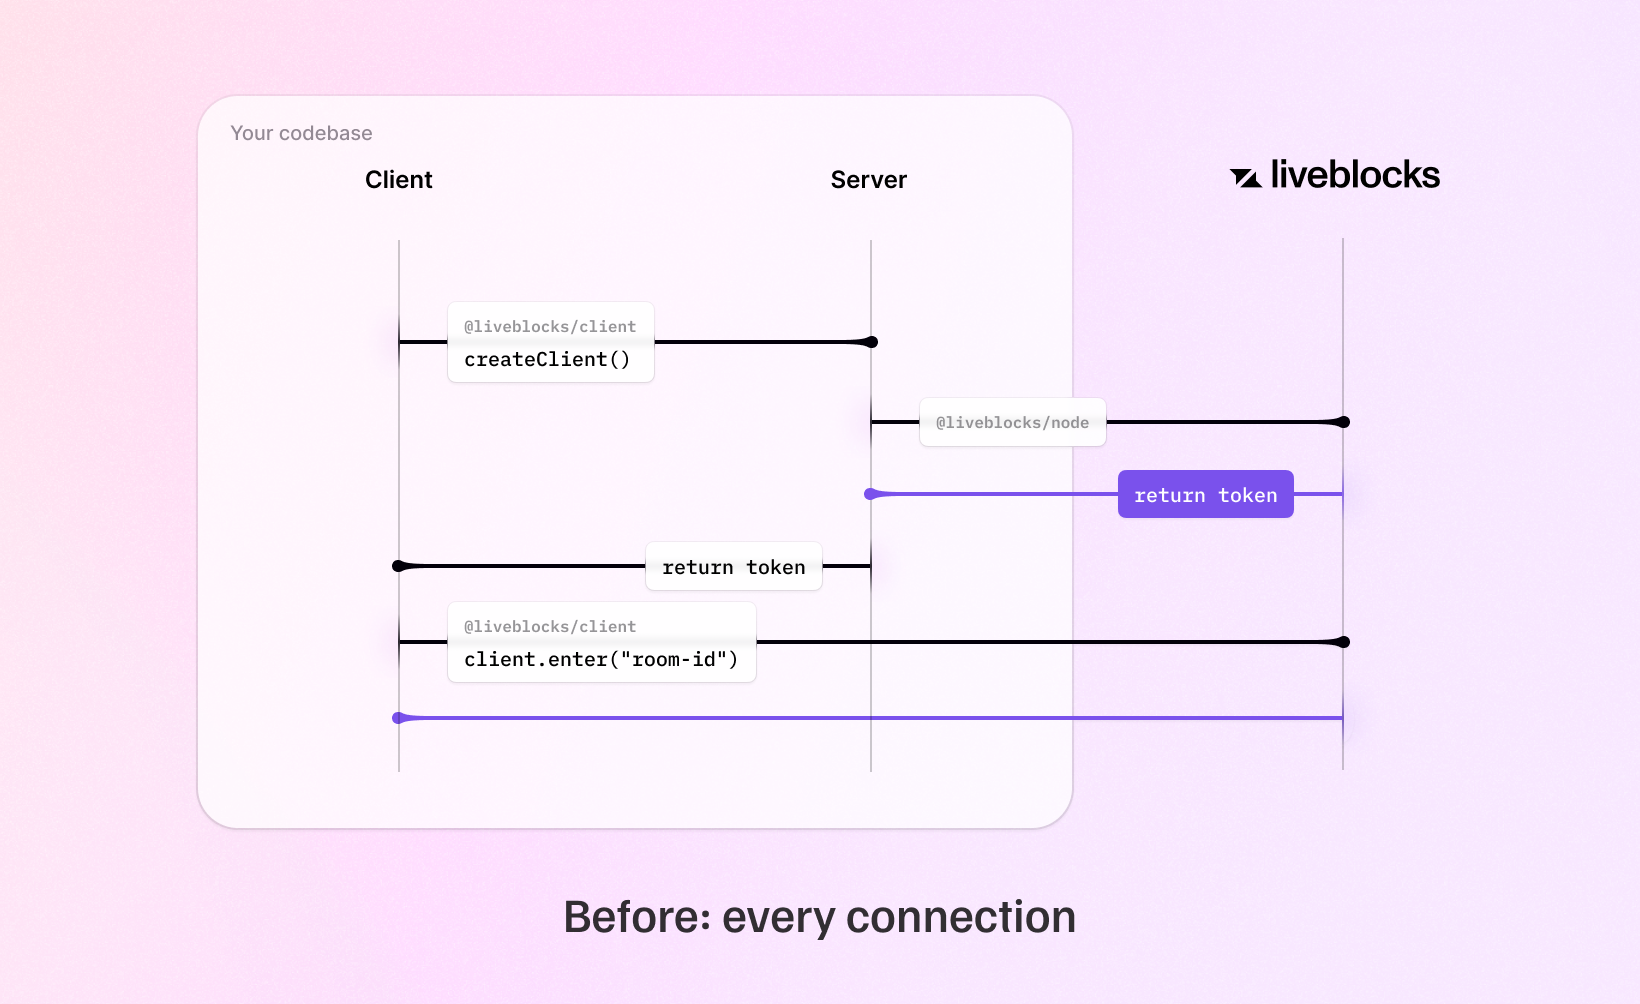
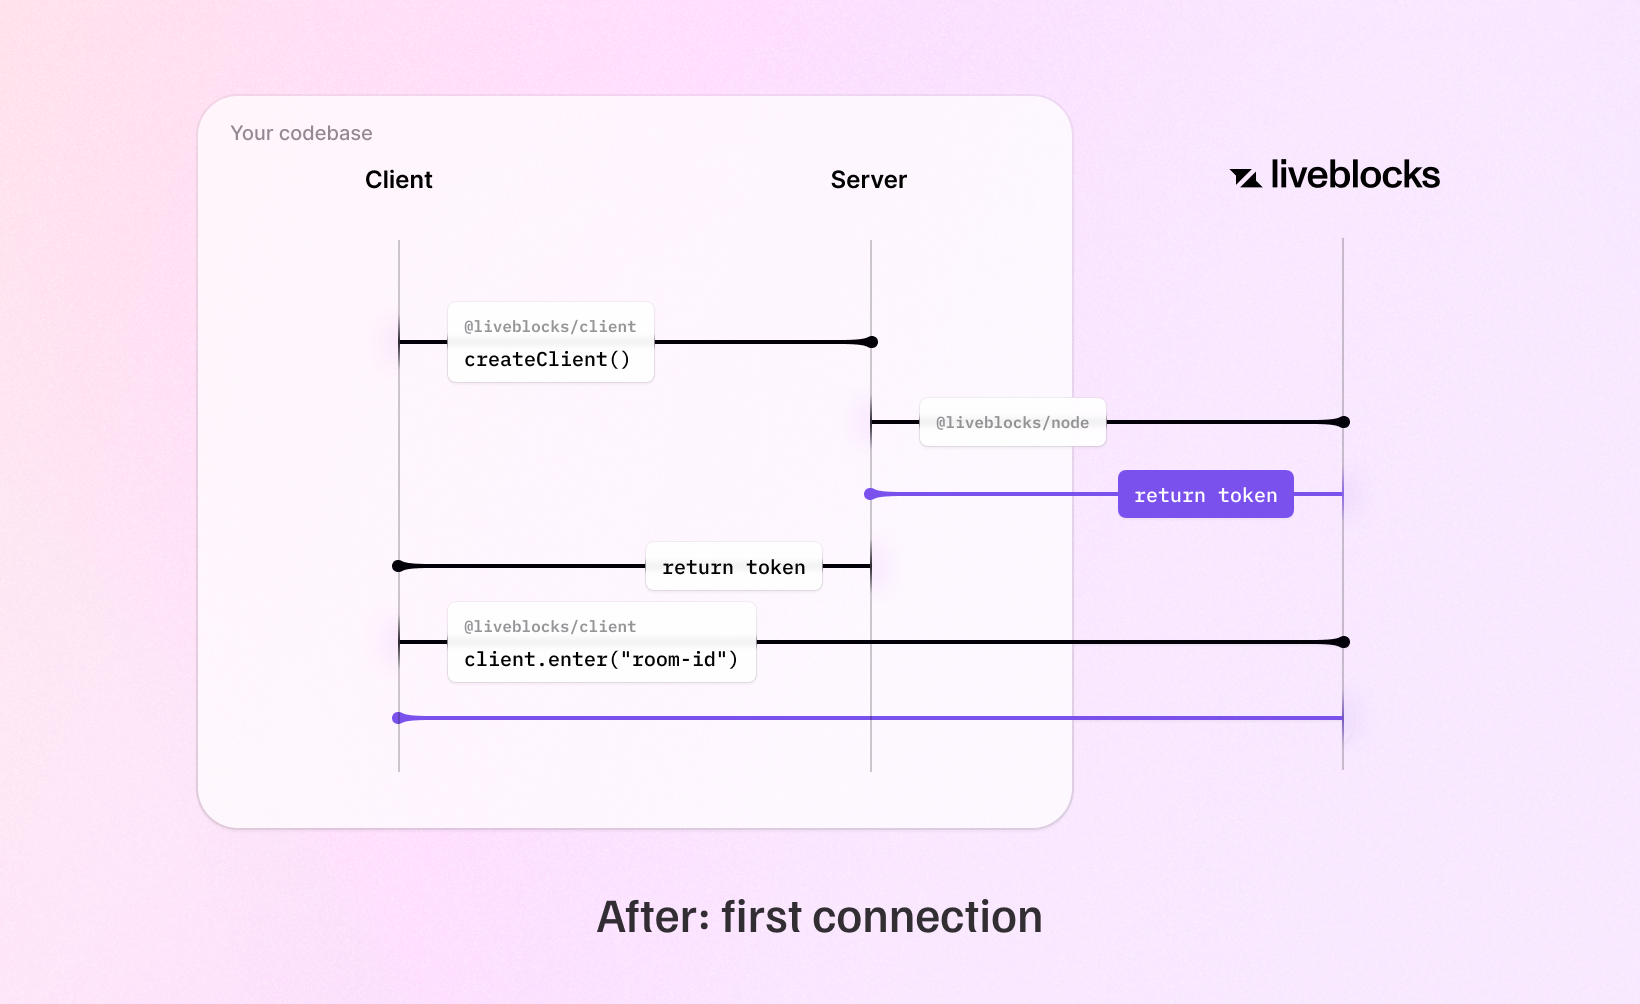
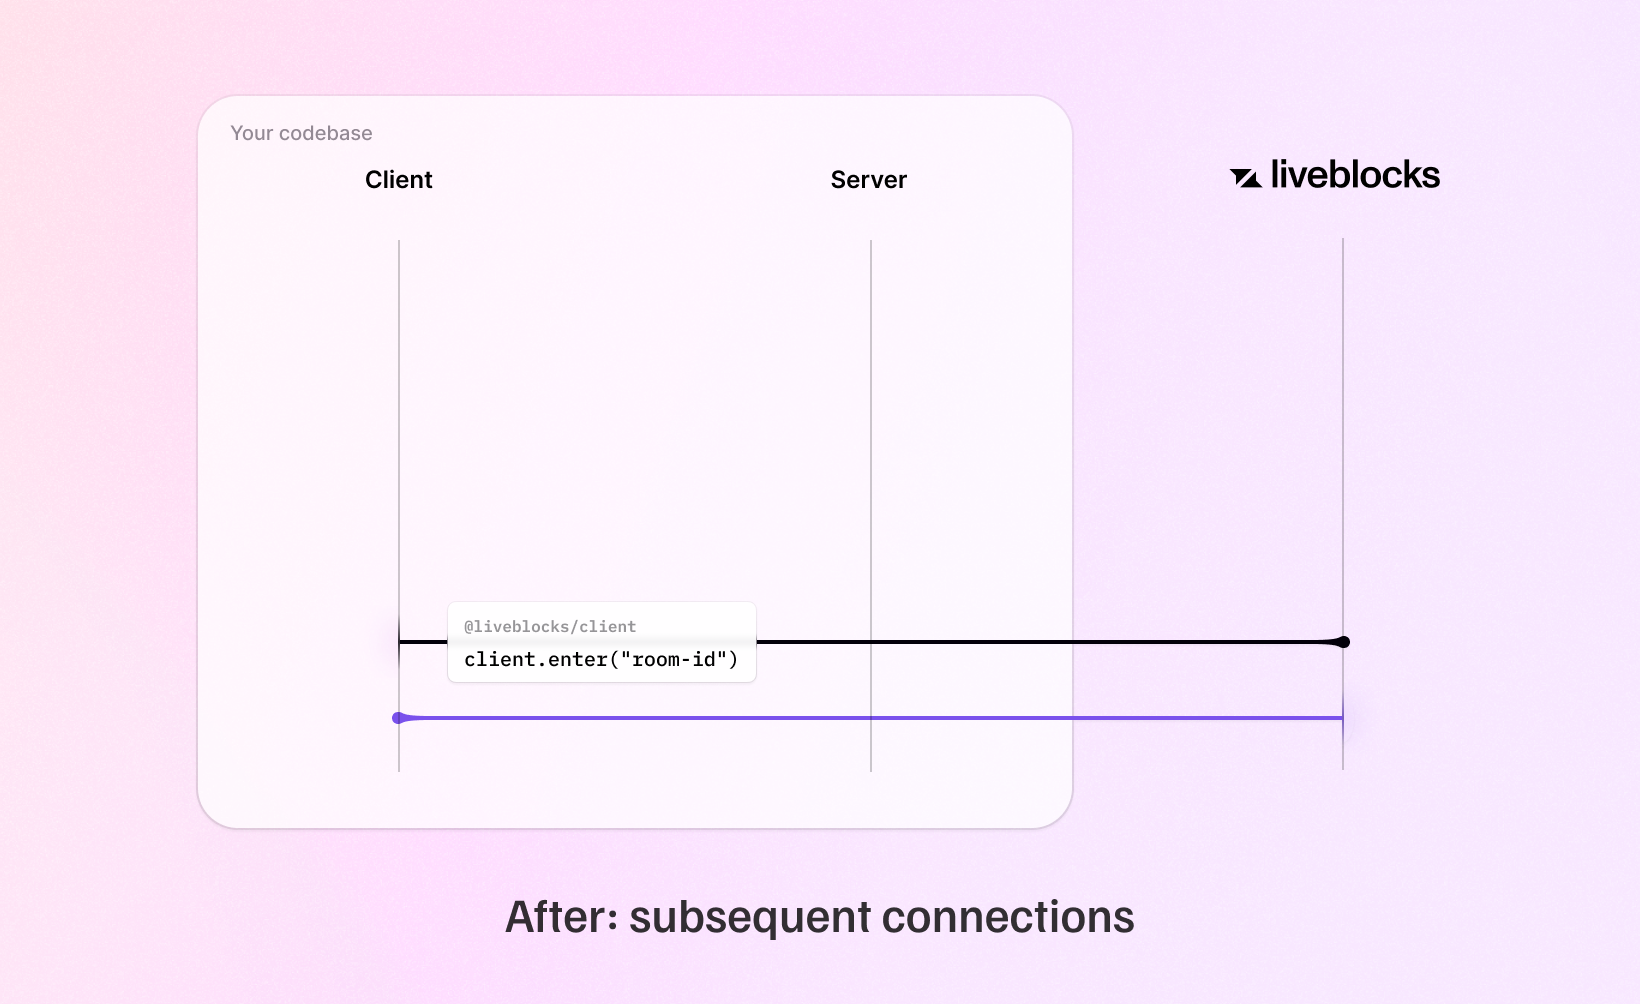
The new authentication model makes connecting to a Liveblocks room quicker due to reduced round trips between clients and servers, enabling users to save seconds of loading time.
JWT tokens are no longer generated when using public keys. This enables us to save one round trip between Liveblocks servers and your client code.
JWT tokens are only generated once when using secret keys. This makes subsequent connections to rooms significantly faster.
Single-room tokens (the previous authentication method) generated through both public and secret keys will continue to work for now, but will be deprecated in the coming months. If you use public keys, tokens won’t be needed anymore in v1.2. If you use secret keys, we recommend that you update your back end endpoint to use the new methods. For most cases, we recommend access tokens, but if you’re already using Liveblocks permissions, ID tokens may be the better choice.
We’ve written a migration guide to help you migrate.
Huge thanks to everyone who contributed and specifically to Chris Nicholas and Guillaume Salles for the feedback and help testing this out. Also a big shout out to our incredible community that keeps jumping in to help us improve our infrastructure! Keep checking out the changelog for the full release notes – see you next time!


