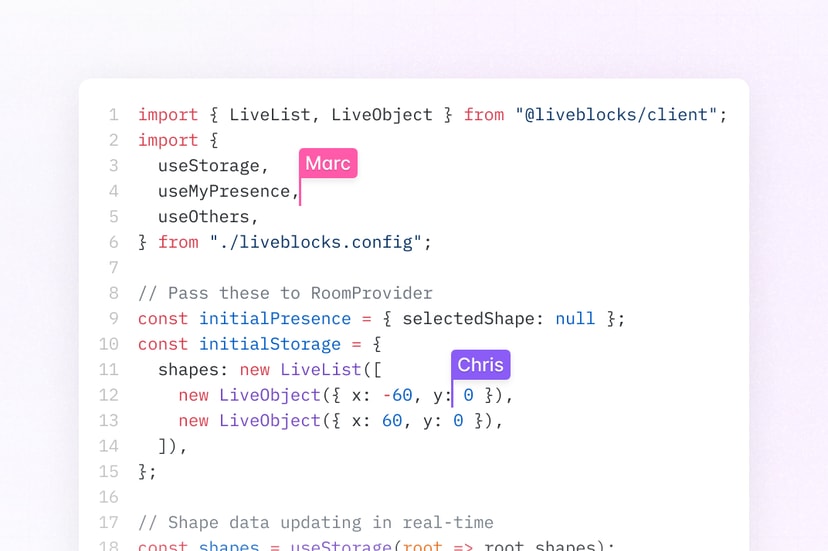
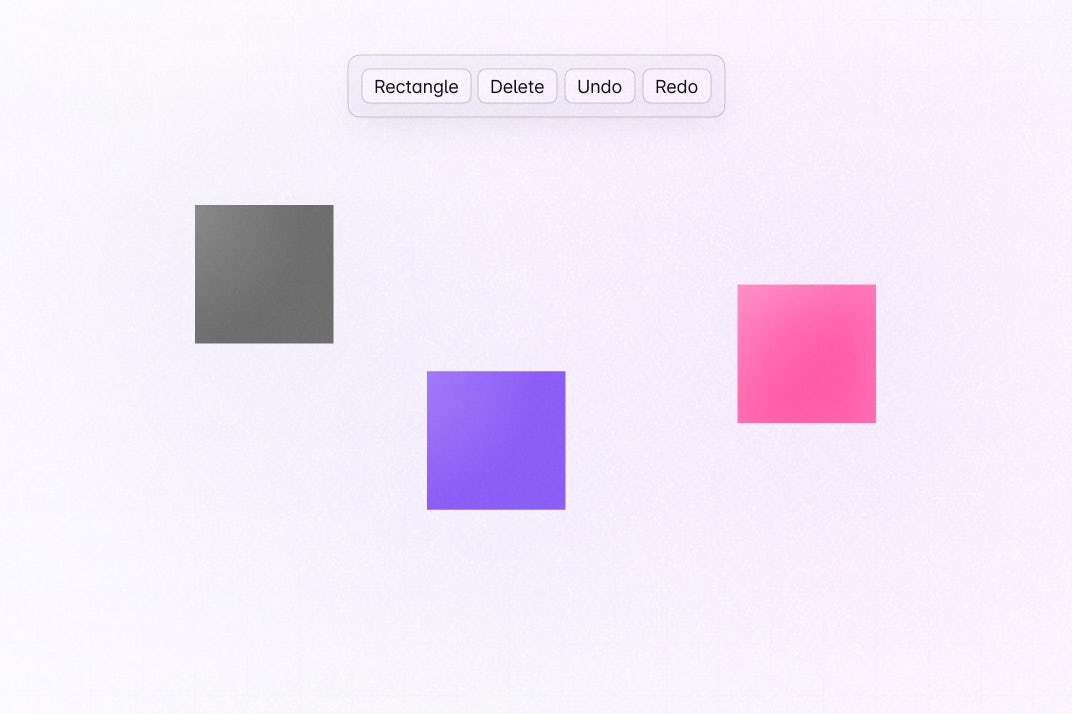
How to create a collaborative online whiteboard with React and Liveblocks

In this 25-minute tutorial, we’ll be building a collaborative whiteboard app using React and Liveblocks. As users add and move rectangles in a canvas, changes will be automatically synced and persisted, allowing for a canvas that updates in real-time across clients. Users will also be able to see other users selections, and undo and redo actions.

This guide assumes that you’re already familiar with React. If you’re using a state-management library such as Redux or Zustand, we recommend reading one of our dedicated whiteboard tutorials:

A live demo and the source code for this guide are in our examples.

Install Liveblocks into your project

Install Liveblocks packages

Create a new app with create-react-app:

$npx create-react-app react-whiteboard

Then run the following command to install the Liveblocks packages:

$npm install @liveblocks/client @liveblocks/react

Connect to Liveblocks servers

In order to use Liveblocks, we’ll need to sign up and get an API key. Create an account, then navigate to the dashboard to find your public key. It should start with pk_.

Let’s now add a new file src/liveblocks.config.js in our application to create a Liveblocks client using the public key as shown below.

src/liveblocks.config.js
import { createClient } from "@liveblocks/client";
const client = createClient({ publicApiKey: "",});

Connect to a Liveblocks room

Liveblocks uses the concept of rooms, separate virtual spaces where people can collaborate. To create a multiplayer experience, multiple users must be connected to the same room.

Instead of using the client directly, we’re going to use createRoomContext from @liveblocks/react to create a RoomProvider and hooks to make it easy to consume from our components.

src/liveblocks.config.js
import { createClient } from "@liveblocks/client";import { createRoomContext } from "@liveblocks/react";
const client = createClient({ publicApiKey: "",});
export const { RoomProvider } = createRoomContext(client);

You might be wondering why we’re creating our Providers and Hooks with createRoomContext instead of importing them directly from @liveblocks/client. This allows TypeScript users to define their Liveblocks types once in one unique location—allowing them to get a great autocompletion experience when using those hooks elsewhere.

We can now import the RoomProvider directly from our src/liveblocks.config.js file.

src/index.js
import React from "react";import ReactDOM from "react-dom";import "./index.css";import App from "./App";
import { RoomProvider } from "./liveblocks.config";
ReactDOM.render( <React.StrictMode> <RoomProvider id="react-whiteboard-app" initialPresence={{}}> <App /> </RoomProvider> </React.StrictMode>, document.getElementById("root"));

Every component wrapped inside RoomProvider will have access to the special React hooks we’ll be using to interact with this room.

Create a canvas

We’re going to use a LiveMap to store a map of shapes inside the room’s storage. A LiveMap is a type of storage that Liveblocks provides. A LiveMap is like a JavaScript map, but its items are synced in real-time across different clients. Even if multiple users insert or delete items simultaneously, the LiveMap will still be consistent for all users in the room.

Initialize the storage with the initialStorage prop on the RoomProvider.

src/index.js
import React from "react";import ReactDOM from "react-dom";import "./index.css";import App from "./App";
import { LiveMap } from "@liveblocks/client";import { RoomProvider } from "./liveblocks.config";
const client = createClient({ publicApiKey: "",});
ReactDOM.render( <React.StrictMode> <RoomProvider id="react-whiteboard-app" initialPresence={{}} initialStorage={{ shapes: new LiveMap(), }} > <App /> </RoomProvider> </React.StrictMode>, document.getElementById("root"));

We’re going to use the useMap hook to get the map of shapes previously created. Let’s re-export it from scr/liveblocks.config.

src/liveblocks.config.js
import { createClient } from "@liveblocks/client";import { createRoomContext } from "@liveblocks/react";
const client = createClient({ publicApiKey: "",});
export const { RoomProvider, useMap } = createRoomContext(client);

useMap returns null while it’s still connecting to Liveblocks, so we can rely on that to show a loading state first. Once it’s connected, we can draw the shapes in our canvas. To keep it simple for the tutorial, we are going to only support rectangle.

src/App.js
import { useMap } from "./liveblocks.config";
import "./App.css";
export default function App() { const shapes = useMap("shapes");
if (shapes == null) { return <div className="loading">Loading</div>; }
return <Canvas shapes={shapes} />;}
function Canvas({ shapes }) { return ( <> <div className="canvas"> {Array.from(shapes, ([shapeId, shape]) => { return <Rectangle key={shapeId} shape={shape} />; })} </div> </> );}
const Rectangle = ({ shape }) => { const { x, y, fill } = shape;
return ( <div className="rectangle" style={{ transform: `translate(${x}px, ${y}px)`, backgroundColor: fill ? fill : "#CCC", }} ></div> );};

Place the following within src/App.css, and then you will be able to insert rectangular shapes into the whiteboard.

Insert rectangles

Our whiteboard is currently empty, and there’s no way to add rectangles. Let’s create a button that adds a randomly placed rectangle to the board.

We’ll use shapes.set to add a new rectangle to the LiveMap.

src/App.js
import { useMap } from "./liveblocks.config";
import "./App.css";
const COLORS = ["#DC2626", "#D97706", "#059669", "#7C3AED", "#DB2777"];
function getRandomInt(max) { return Math.floor(Math.random() * max);}
function getRandomColor() { return COLORS[getRandomInt(COLORS.length)];}
/* App */
function Canvas({ shapes }) { const insertRectangle = () => { const shapeId = Date.now().toString(); const rectangle = { x: getRandomInt(300), y: getRandomInt(300), fill: getRandomColor(), }; shapes.set(shapeId, rectangle); };
return ( <> <div className="canvas"> {Array.from(shapes, ([shapeId, shape]) => { return <Rectangle key={shapeId} shape={shape} />; })} </div> <div className="toolbar"> <button onClick={insertRectangle}>Rectangle</button> </div> </> );}
/* Rectangle */

Add selection

We can use Liveblocks to display which shape each user is currently selecting, in this case by adding a border to the rectangles. We’ll use a blue border to represent the local user, and green borders for remote users.

To do this, we’ll employ the useMyPresence hook to store a user’s selected shape, and then the useOthers hook to find other users’ selected shapes. But first, let’s re-export those hooks from src/liveblocks.config like we did previously with useMap.

src/liveblocks.config.js
import { createClient } from "@liveblocks/client";import { createRoomContext } from "@liveblocks/react";
const client = createClient({ publicApiKey: "",});
export const { RoomProvider, useOthers, useMyPresence, useMap } = createRoomContext(client);

We can now use those hooks directly in our application by importing them from src/liveblocks.config.js.

src/App.js
import { useMap, useMyPresence, useOthers } from "./liveblocks.config";
/* ... */
function Canvas({ shapes }) { const [{ selectedShape }, setPresence] = useMyPresence(); const others = useOthers();
/* ... */
const onShapePointerDown = (e, shapeId) => { setPresence({ selectedShape: shapeId }); };
return ( <> <div className="canvas"> {Array.from(shapes, ([shapeId, shape]) => { let selectionColor = selectedShape === shapeId ? "blue" : others .toArray() .some((user) => user.presence?.selectedShape === shapeId) ? "green" : undefined; return ( <Rectangle key={shapeId} shape={shape} id={shapeId} onShapePointerDown={onShapePointerDown} selectionColor={selectionColor} /> ); })} </div> <div className="toolbar"> <button onClick={insertRectangle}>Rectangle</button> </div> </> );}
const Rectangle = ({ shape, id, onShapePointerDown, selectionColor }) => { const { x, y, fill } = shape;
return ( <div onPointerDown={(e) => onShapePointerDown(e, id)} className="rectangle" style={{ transform: `translate(${x}px, ${y}px)`, backgroundColor: fill ? fill : "#CCC", borderColor: selectionColor || "transparent", }} ></div> );};

Delete rectangles

Now that users can select rectangles, we can add a button that allow deleting rectangles too.

We’ll use shapes.delete to remove the selected shape from the LiveMap, and then reset the user’s selection.

src/App.js
/* ... */
const deleteRectangle = () => { shapes.delete(selectedShape); setPresence({ selectedShape: null });};
/* ... */
<div className="toolbar"> <button onClick={insertRectangle}>Rectangle</button> <button onClick={deleteRectangle} disabled={selectedShape == null}> Delete </button></div>;
/* ... */

Move rectangles

Let’s move some rectangles!

To allow users to move rectangles, we’ll update the x and y properties using shapes.set when a user drags a shape.

src/App.js
import { useState } from "react";import { useMap, useMyPresence, useOthers } from "./liveblocks.config";
/* ... */
function Canvas({ shapes }) { const [isDragging, setIsDragging] = useState(false); const [{ selectedShape }, setPresence] = useMyPresence();
/* ... */
const onShapePointerDown = (e, shapeId) => { e.stopPropagation();
setPresence({ selectedShape: shapeId });
setIsDragging(true); };
const onCanvasPointerUp = (e) => { if (!isDragging) { setPresence({ selectedShape: null }); }
setIsDragging(false); };
const onCanvasPointerMove = (e) => { e.preventDefault();
if (isDragging) { const shape = shapes.get(selectedShape); if (shape) { shapes.set(selectedShape, { ...shape, x: e.clientX - 50, y: e.clientY - 50, }); } } };
return ( <div className="canvas" onPointerMove={onCanvasPointerMove} onPointerUp={onCanvasPointerUp} > {Array.from(shapes, ([shapeId, shape]) => { return <Rectangle /* ... */ />; })} </div> );}
/* Rectangle */

Multiplayer undo/redo

With Liveblocks, you can enable multiplayer undo/redo in just a few lines of code.

We’ll add the useHistory hook and call history.undo() and history.redo() when the user presses "undo" or "redo". By default, only modifications made to the storage are added to the undo/redo history. In this example, that means all changes made to shapes (because it’s a LiveMap)."

Like we did with the others hooks, re-export it from your src/liveblocks.config.

src/liveblocks.config.js
import { createClient } from "@liveblocks/client";import { createRoomContext } from "@liveblocks/react";
const client = createClient({ publicApiKey: "",});
export const { RoomProvider, useOthers, useMyPresence, useMap, useHistory } = createRoomContext(client);

To undo a change to presence we need to add the { addToHistory: true } option to setPresence.

src/App.js
import { useEffect, useState } from "react";import {  useMap,  useMyPresence,  useOthers,  useHistory,} from "./liveblocks.config";
/* ... */
function Canvas({ shapes }) { const history = useHistory();
/* ... */
const onShapePointerDown = (e, shapeId) => { e.stopPropagation();
setPresence({ selectedShape: shapeId }, { addToHistory: true });
setIsDragging(true); };
const onCanvasPointerUp = (e) => { if (!isDragging) { setPresence({ selectedShape: null }, { addToHistory: true }); }
setIsDragging(false); };
/* ... */
return ( <> {/* ... */} <div className="toolbar"> {/* ... */} <button onClick={history.undo}>Undo</button> <button onClick={history.redo}>Redo</button> </div> </> );}
/* Rectangle */

Pause and resume history

When a user moves a rectangle, a large number of actions are sent to Liveblocks and live synced, enabling other users to see movements in real-time.

The problem with this is that the undo button returns the rectangle to the last intermediary position, and not the position where the rectangle started its movement. We can fix this by pausing storage history until the move has completed.

We’ll use history.pause to disable adding any positions to the history stack while the cursors moves, and then call history.resume afterwards.

src/App.js
const onShapePointerDown = (e, shapeId) => {  history.pause();  e.stopPropagation();
setPresence({ selectedShape: shapeId }, { addToHistory: true });
setIsDragging(true);};
const onCanvasPointerUp = (e) => { if (!isDragging) { setPresence({ selectedShape: null }, { addToHistory: true }); }
setIsDragging(false);
history.resume();};

Batch insert and selection

In one click we can undo both creating a rectangle, and selecting a rectangle, by merging both changes into a single history state.

We can add the useBatch hook to do this, by calling all our changes within the batch() callback argument.

Like we did with the others hooks, re-export it from your src/liveblocks.config.

src/liveblocks.config.js
import { createClient } from "@liveblocks/client";import { createRoomContext } from "@liveblocks/react";
const client = createClient({ publicApiKey: "",});
export const { RoomProvider, useOthers, useMyPresence, useMap, useHistory, useBatch,} = createRoomContext(client);
src/App.js
import { useEffect, useState } from "react";import {  useMap,  useMyPresence,  useOthers,  useHistory,  useBatch,} from "./liveblocks.config";
/* ... */
function Canvas({ shapes }) { /* ... */ const batch = useBatch();
const insertRectangle = () => { batch(() => { const shapeId = Date.now().toString(); const rectangle = { x: getRandomInt(300), y: getRandomInt(300), fill: getRandomColor(), }; shapes.set(shapeId, rectangle); setPresence({ selectedShape: shapeId }, { addToHistory: true }); }); };
/* ... */}

Better performance and conflict resolution

If two users modify the same rectangle at the same time, it’s possible that problems will occur. To provide better conflict resolution, we can use the CRDT-like LiveObject to store each rectangle’s data. Liveblocks storage can contain nested data structures, and in our example, shapes is a LiveMap containing multiple LiveObject items.

To get this working, we need to use room.subscribe, to rerender the rectangles when the nested data structure updates:

Re-export useRoom from src/liveblocks.config to get the current Room from your components.

src/liveblocks.config.js
import { createClient } from "@liveblocks/client";import { createRoomContext } from "@liveblocks/react";
const client = createClient({ publicApiKey: "",});
export const { RoomProvider, useOthers, useMyPresence, useMap, useHistory, useBatch, useRoom,} = createRoomContext(client);
src/App.js
import { useState, useEffect, memo } from "react";import {  useMyPresence,  useMap,  useOthers,  useHistory,  useBatch,  useRoom,} from "./liveblocks.config";import { LiveObject } from "@liveblocks/client";
/* ... */
function Canvas({ shapes }) { /* ... */
const insertRectangle = () => { batch(() => { const shapeId = Date.now().toString(); const shape = new LiveObject({ x: getRandomInt(300), y: getRandomInt(300), fill: getRandomColor(), }); shapes.set(shapeId, shape); setPresence({ selectedShape: shapeId }, { addToHistory: true }); }); };
/* ... */
const onCanvasPointerMove = (e) => { e.preventDefault();
if (isDragging) { const shape = shapes.get(selectedShape); if (shape) { shape.update({ x: e.clientX - 50, y: e.clientY - 50, }); } } };
return (/* ... */);}
const Rectangle = memo(({ shape, id, onShapePointerDown, selectionColor }) => { const [{ x, y, fill }, setShapeData] = useState(shape.toObject());
const room = useRoom();
useEffect(() => { function onChange() { setShapeData(shape.toObject()); }
return room.subscribe(shape, onChange); }, [room, shape]);
return ( <div onPointerDown={(e) => onShapePointerDown(e, id)} className="rectangle" style={{ transform: `translate(${x}px, ${y}px)`, backgroundColor: fill ? fill : "#CCC", borderColor: selectionColor || "transparent", }} ></div> );});

Voilà! We have a working collaborative whiteboard app, with persistent data storage.

Summary

In this tutorial, we’ve learnt about the concept of rooms, presence, and others. We’ve also learnt how to put all these into practice, and how to persist state using storage too.

You can see some stats about the room you created in your dashboard.

Liveblocks dashboard

Next steps