What to check before enabling a new notification kind

When publishing changes to your notification settings in the dashboard, you should make sure your app is ready to handle any webhooks changes. This is not a problem when disabling a notification kind, but when you enable a new notification kind you should check that your app is ready to receive these new notifications.

Enabling in the dashboard

When in the notifications settings dashboard, you can enable and disable various webhook events for different kinds. For example, below we’ve toggled a custom notification kind.

Toggle a custom notification kind

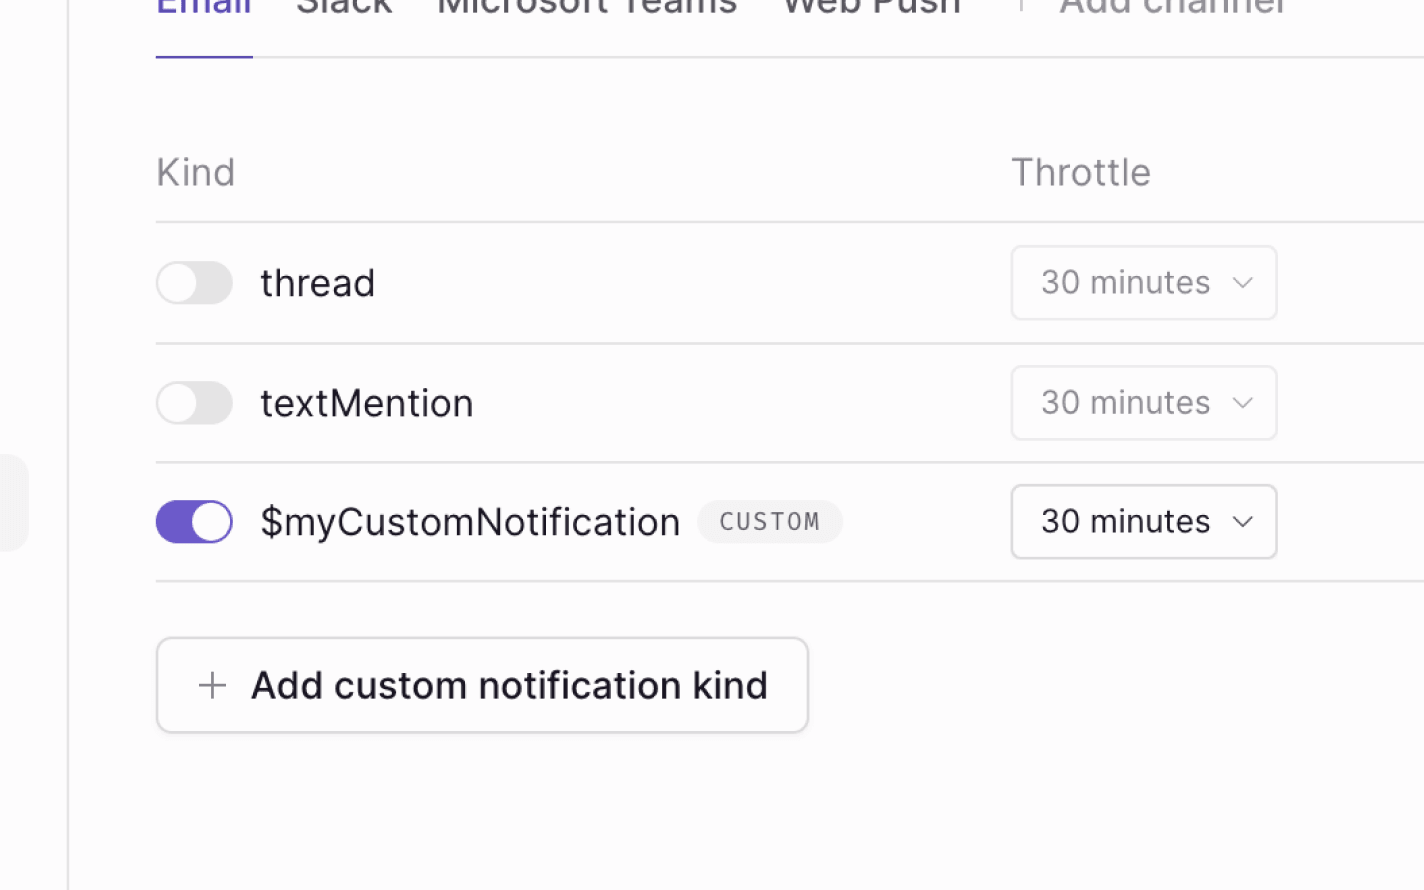
Before publishing this change, it’s important to understand what will occur, and to modify your app.

What happens when you enable a notification kind

After enabling and publishing a notification kind, a new webhook event will be sent for that kind on the channel you selected. Below is an example of an API endpoint set up for a Liveblocks webhook—you can see the new event that will be received if you were to enable a custom notification sent on the email channel.

import { WebhookHandler } from "@liveblocks/node";
// Add your webhook secret key from a project's webhooks dashboardconst WEBHOOK_SECRET = "YOUR_WEBHOOK_SECRET_KEY";const webhookHandler = new WebhookHandler(WEBHOOK_SECRET);
export async function POST(request: Request) { const body = await request.json(); const headers = request.headers;
// Verify if this is a real webhook request let event; try { event = webhookHandler.verifyRequest({ headers: headers, rawBody: JSON.stringify(body), }); } catch (err) { console.error(err); return new Response("Could not verify webhook call", { status: 400 }); }
if (event.type !== "notification") { return new Response("This is not a notification webhook", { status: 400 }); }
// { // type: "notification", // data: { // channel: "email", // kind: "$myCustomNotification", // projectId: "my-project-id", // roomId: "my-room-id", // userId: "my-user-id", // inboxNotificationId: "in_xt3p7ak...", // createdAt: "2021-10-06T01:45:56.558Z", // }, // } console.log(event);
return new Response(null, { status: 200 });}

As you can see above, the two highlighted lines are the fields for the new event, and you’ll need to handle them.

Before publishing the change

Before publishing your notification settings change, you’ll most likely wish to check for channel and kind in your webhook endpoint, and handle it accordingly.

import { WebhookHandler } from "@liveblocks/node";
// Add your webhook secret key from a project's webhooks dashboardconst WEBHOOK_SECRET = "YOUR_WEBHOOK_SECRET_KEY";const webhookHandler = new WebhookHandler(WEBHOOK_SECRET);
export async function POST(request: Request) { const body = await request.json(); const headers = request.headers;
// Verify if this is a real webhook request let event; try { event = webhookHandler.verifyRequest({ headers: headers, rawBody: JSON.stringify(body), }); } catch (err) { console.error(err); return new Response("Could not verify webhook call", { status: 400 }); }
if (event.type !== "notification") { return new Response("This is not a notification webhook", { status: 400 }); }
if ( event.data.channel === "email" && event.data.kind === "$myCustomNotification" ) { // Send an email to your user for this custom notification // ...
return new Response(null, { status: 200 }); }
return new Response(null, { status: 200 });}

If you don’t handle this, you may find yourself running into problems, depending on the way you’ve written the logic in your app.

Safe to publish

After changing your webhook endpoint, it’s safe for you to go back to the notification settings page, and publish your changes.

Enable a notification kind

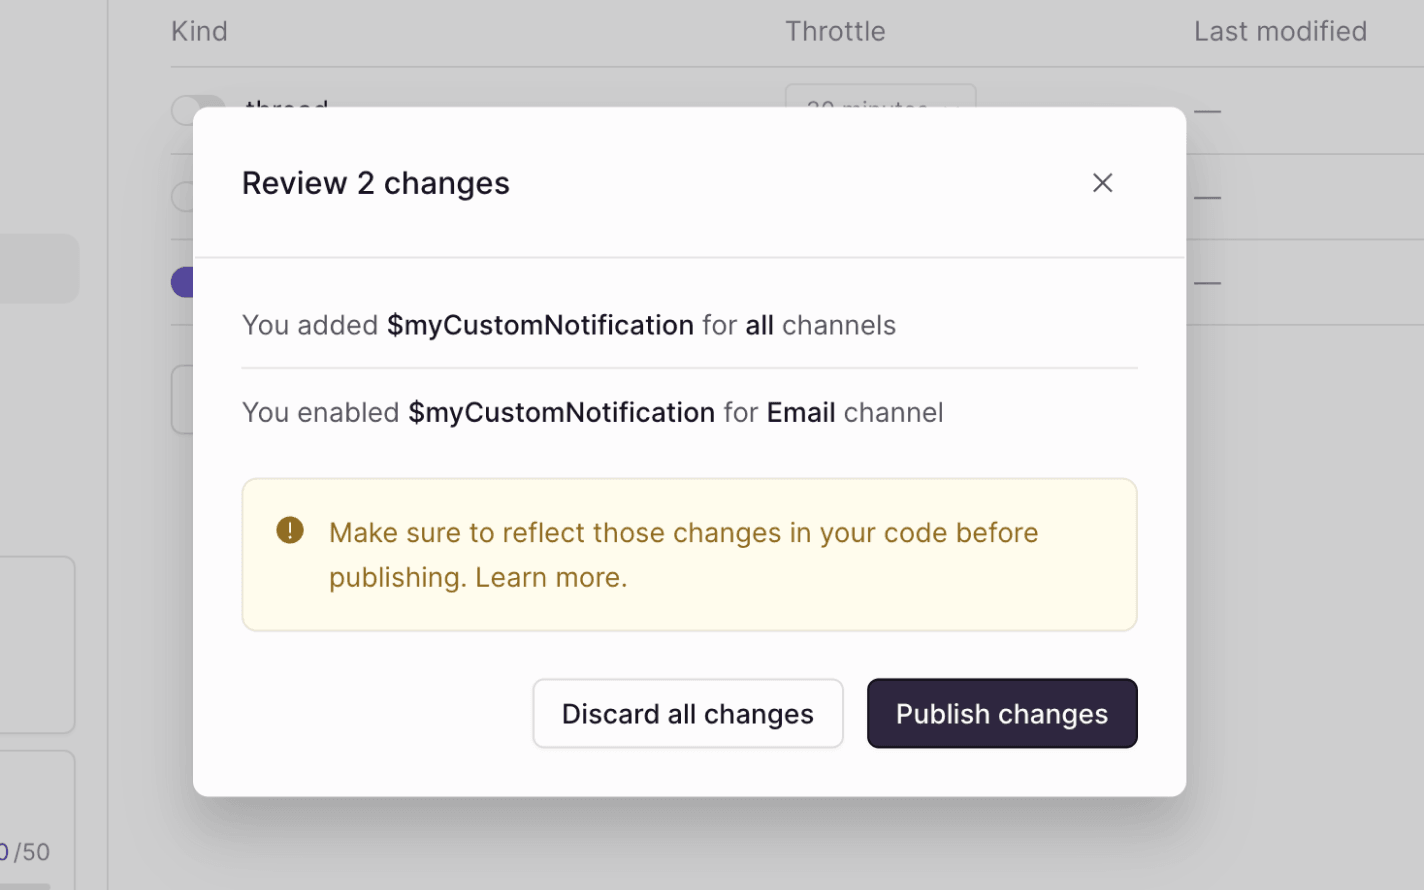
Events for the new notification kind will now be called in your app.

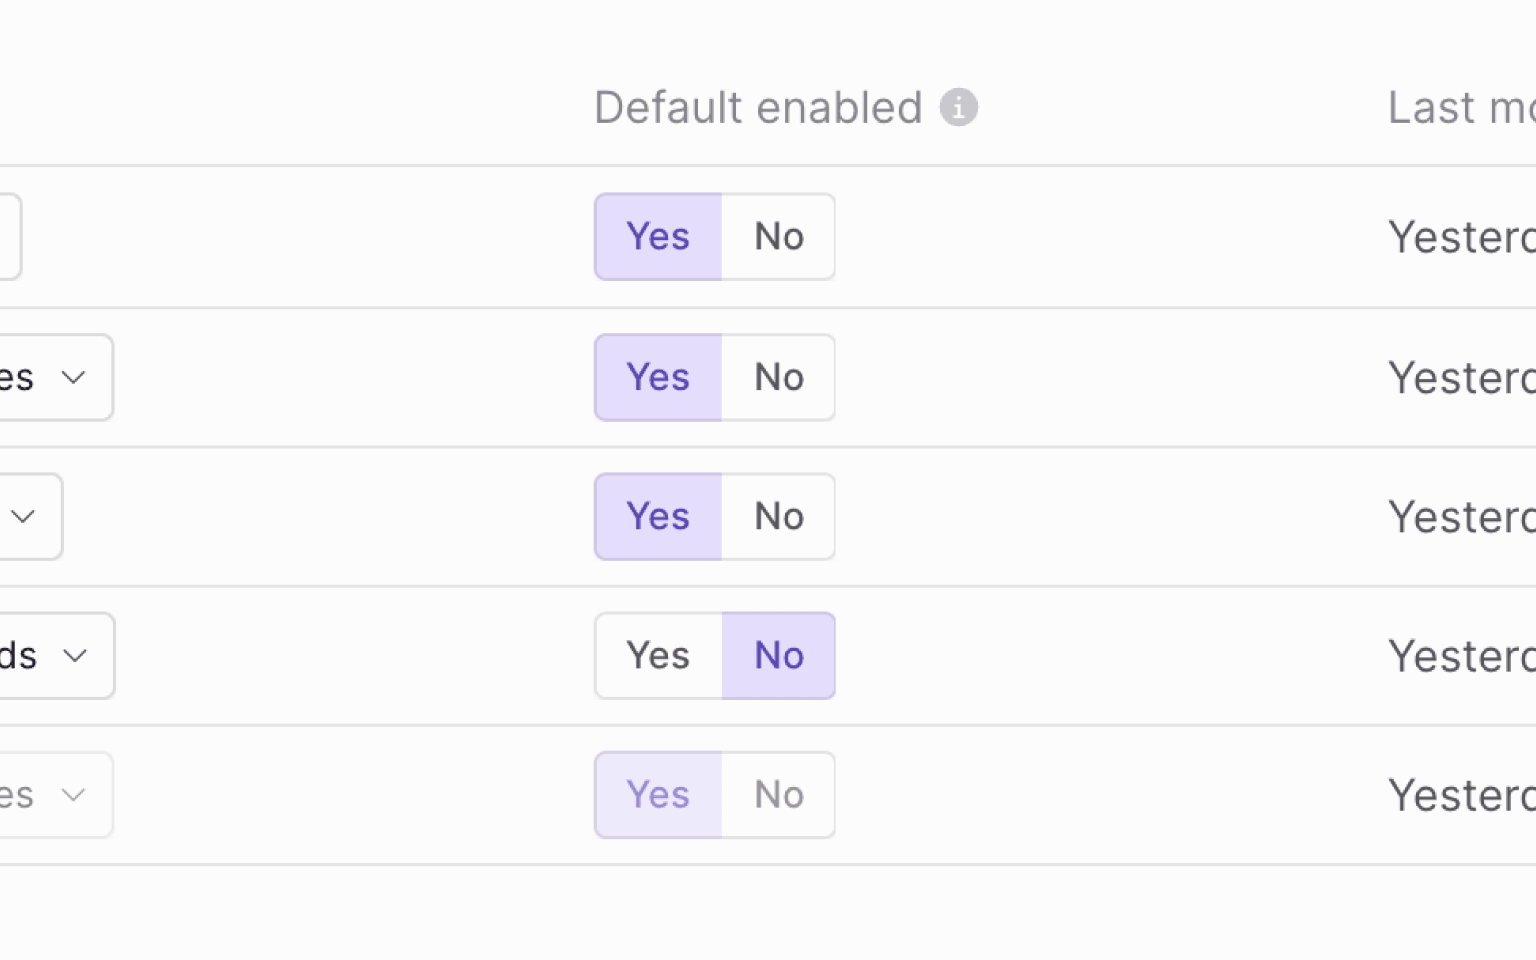
Users can change their preferences

Each user in your app can set their own preferences for notifications, and after enabling a notification kind, each user’s will be set to the default value.

Default notification settings

You can use useUpdateNotificationSettings to view and set each user’s individual values, making it easy to create notification setting panels. Below, we’re allowing users to toggle thread notifications on the email channel.

import { useNotificationSettings } from "@liveblocks/react";
function NotificationSettings() { const [{ isLoading, error, settings }, updateSettings] = useNotificationSettings();
if (isLoading || error) { return null; }
return ( <form> <input type="checkbox" checked={settings.email.thread} onChange={(e) => updateSettings({ email: { thread: e.target.checked } }) } id="setting-email-thread" /> <label htmlFor="setting-email-thread"> Receive thread notifications by email </label> </form> );}

You can use this hook to create a full notification panel for each user. If you’re not on React, you can use JavaScript or Node.js functions instead.

We use cookies to collect data to improve your experience on our site. Read our Privacy Policy to learn more.