How to create a notification settings panel
Notifications allows you to add in-app notifications to your product. However, it also allows you to send unread notifications via other channels, such as email, Slack, Microsoft Teams—an effective way to link back to your app and keep users engaged.
Additionally, Liveblocks allows your end users to individually choose which notifications they should receive, and on which channel. This guide shows you how to create a notification preferences panel, which enables this.
Set up webhooks first
Before starting, it’s important that you’ve already set up a notification channel in our dashboard, and set up a webhook endpoint. Here are two guides that take you through how to do this:
- How to send email notifications of unread comments.
- How to send email notifications for unread text editor mentions.
Enabling a notification channel
If you’ve followed one of the previous guides, you should already have enabled a notification kind for a certain channel in the Notifications dashboard (this is different to setting up a webhook), however if you already have a production project, make sure of what to check before enabling a notification kind before continuing, as you may change the behavior of your app.
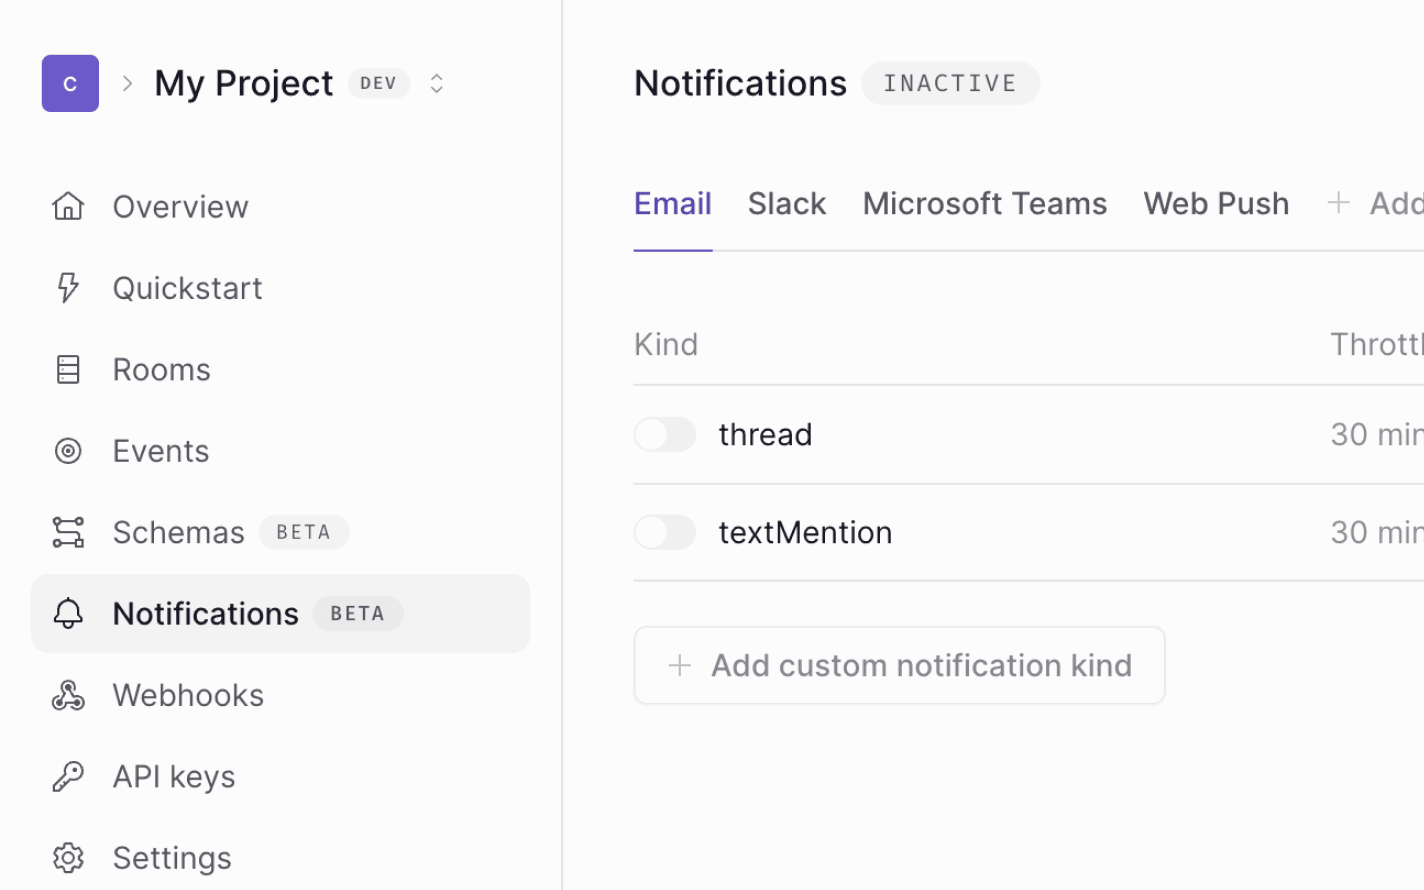
Each notification channel has a unique identifier, such as email or slack,
but they all function in the same way. These distinct names allow developers to
customize notifications for different platforms.
Building the interface
Now that the back end’s set up, you can use Liveblocks hooks to build the interface. Each user in your app can set their own preferences for notifications, and after enabling a notification kind, each user’s will be set to the default value in the Notifications dashboard.
With
useNotificationSettings
you can see the default value in your app. For example, the value if thread
notifications on the email channel are enabled:
You can also use this function to toggle values—this will disable corresponding webhook events for the current user, meaning they no longer receive notifications of that type, on that channel. All other webhook events are sent as normal, only the current user is affected. Here’s how to create a checkbox that toggles the current user’s email/thread setting, disabling the corresponding webhook.
Also make sure to check if the notification kind is enabled before creating the
UI. This way, if it’s toggled in the dashboard, it will gracefully
disappear/reappear. We’re doing this above by checking if settings.email
exists before displaying the input.
Custom notification kinds
You can also use
custom notification kinds
as highlighted below, where we’re using a custom $documentInvite kind.
Note that you can type your app to receive hints for custom notifications.
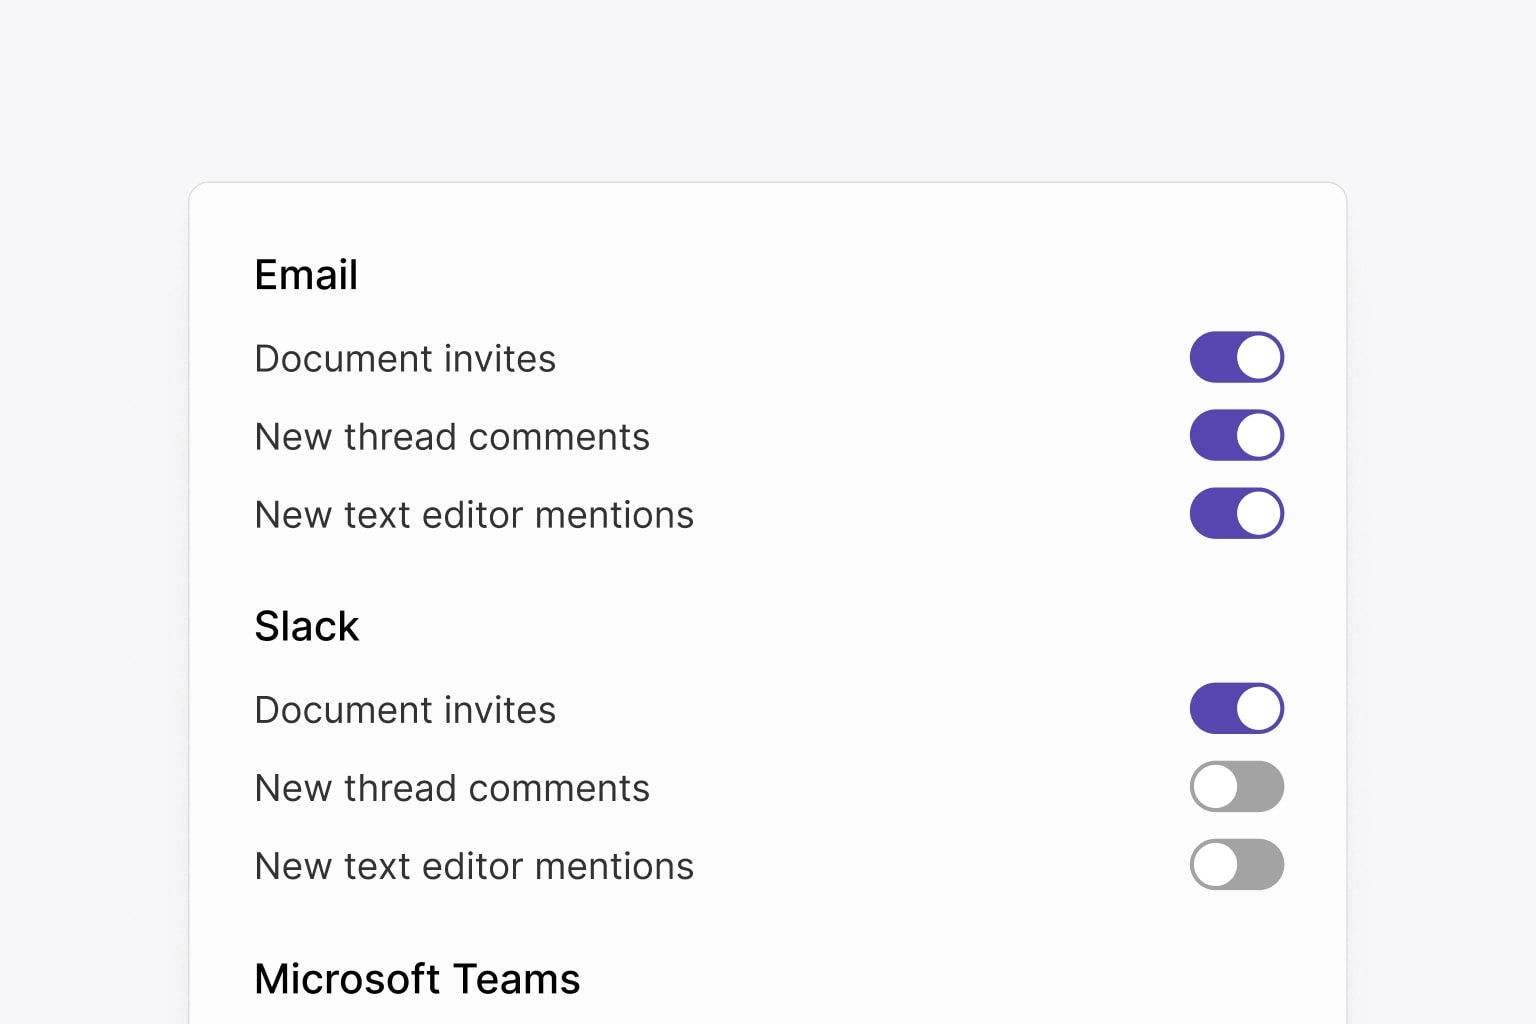
Extend it further
If you extend this further, you can create a whole notifications settings panel,
with settings for each notification kind on channel. Below we’ve created an
interface with three kinds of two channels, email and Slack. Like with
settings.email, we’re also checking if settings.slack exists before using
it.
You now have a notification settings interface that allows each user to choose their own settings! This works by toggling webhooks on specific channels and kinds.
Other methods
Should you need to access and modify notification settings outside of React, we also provide JavaScript functions, Node.js methods, and REST API endpoints.